To ensure proper function of the remote control follow the steps below:
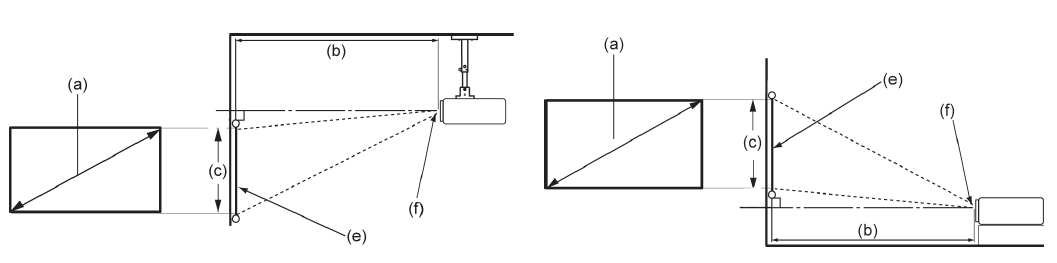
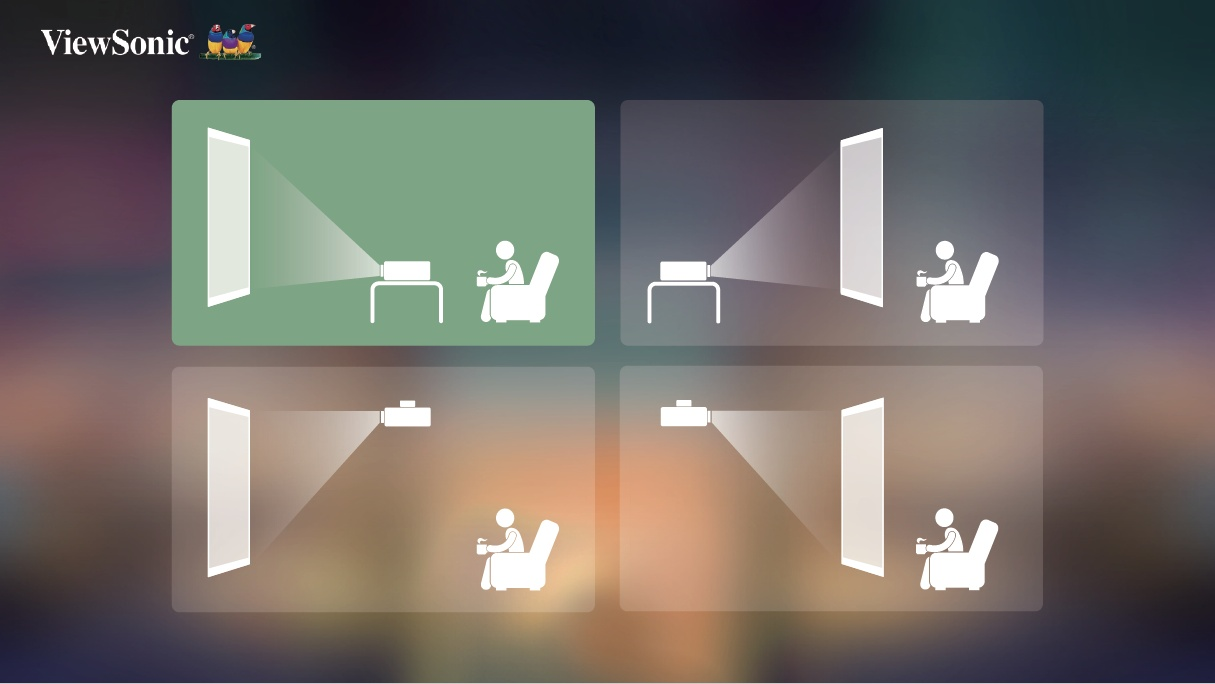
Personal preference and room layout will decide the installation location. Consider the following:
| Location | Description |
|---|---|
| Front Table | The projector is placed near the floor in front of the screen. |
| Front Ceiling | The projector is suspended upside-down from the ceiling in front of the screen. |
| Rear Table [1] | The projector is placed near the floor behind the screen. |
| Rear Ceiling [1] | The projector is suspended upside-down from the ceiling behind the screen. |
NOTE: (e) = Screen | (f) = Center of Lens
| (a) Screen Size | (b) Projection Distance | (c) Image Height | Image Width | ||||||
|---|---|---|---|---|---|---|---|---|---|
| Minimum | Maximum | ||||||||
| in. | cm | in. | m | in. | m | in. | cm | in. | mm |
| 30 | 76.2 | 32.16 | 0.82 | 32.16 | 0.82 | 14.7 | 37.36 | 26.15 | 664 |
| 40 | 101.6 | 42.88 | 1.09 | 42.88 | 1.09 | 19.6 | 49.81 | 34.86 | 886 |
| 50 | 127 | 53.6 | 1.36 | 53.6 | 1.36 | 24.5 | 62.26 | 43.58 | 1107 |
| 60 | 152.4 | 64.32 | 1.63 | 64.32 | 1.63 | 29.4 | 74.72 | 52.29 | 1328 |
| 70 | 177.8 | 75.04 | 1.91 | 75.04 | 1.91 | 34.3 | 87.17 | 61.01 | 1550 |
| 80 | 203.2 | 85.76 | 2.18 | 85.76 | 2.18 | 39.2 | 99.62 | 69.73 | 1771 |
| 90 | 228.6 | 96.48 | 2.45 | 96.48 | 2.45 | 44.1 | 112.07 | 78.44 | 1992 |
| 100 | 254 | 107.2 | 2.72 | 107.2 | 2.72 | 49 | 124.53 | 87.16 | 2214 |
There is a 3% tolerance among these numbers due to optical component variations. It is recommended to physically test the projection size and distance before permanently installing the projector.
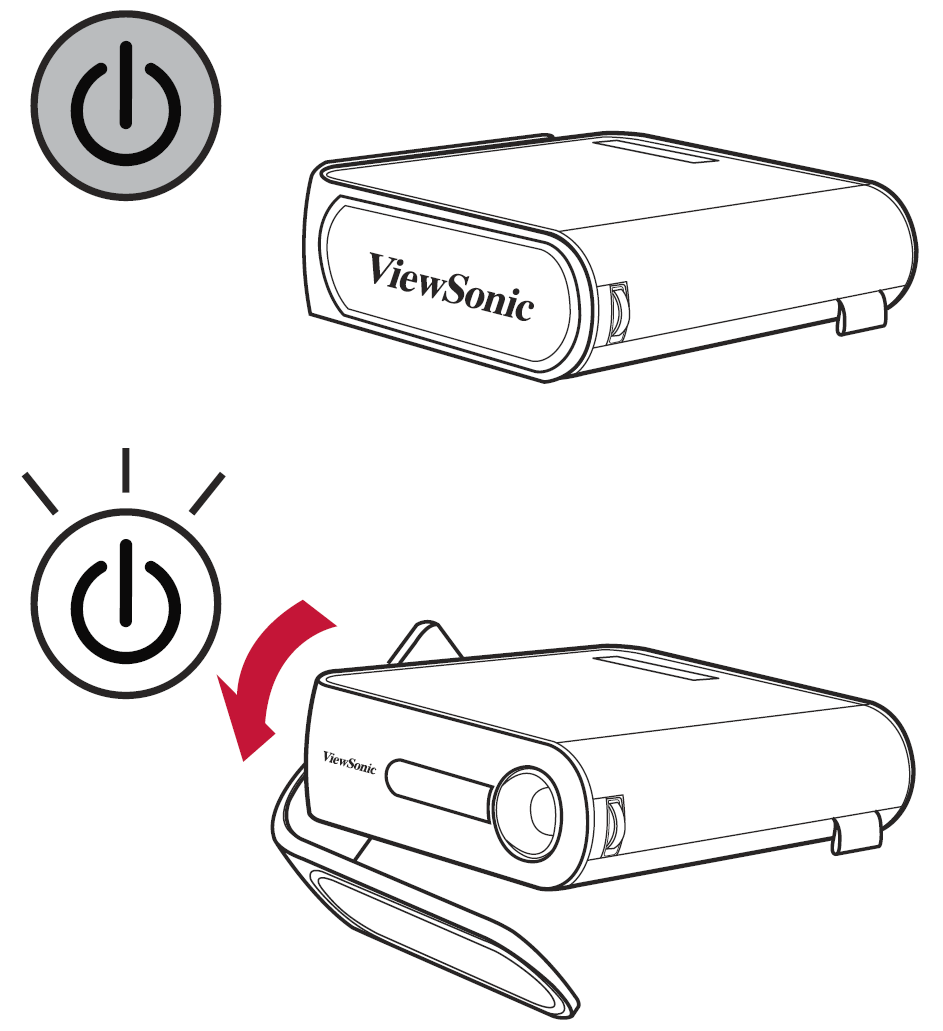
The projector can also be powered by a power bank.
To power your projector:
The battery level icon will show at the top right of the Home Screen. As the battery’s power level runs low, the screen will show a “low battery message”.
Battery Usage Time Information
| Charging | About 4.5 hours |
| Usage Hours | up to 6 hours (Battery Saving)/up to 4 hours (Extended Eco)/up to 3 hours (ECO) /up to 2.5 hours (Full) |
| Battery Level Indicator (Charging) | During Charging: Flashing White LED light |
Full Charge: Solid White LED light
Connect one end of an HDMI cable to the HDMI port of your video device. Then connect the other end of the cable to the HDMI port (supports HDCP 1.4/HDMI 1.4) of your projector.
USB Type A Connection
To enjoy photos, music, and movies, simply plug in a USB flash drive to the USB Type A port.
USB-C Connection
Connect one end of a USB Type C cable to the USB-C port of your device. Then connect the other end of the cable to the USB-C port of your projector.
To enjoy photos, music, and movies, simply plug in a microSD to the Micro SD slot.
NOTE: Only supports FAT32 format and up to 64 GB.
The projector is equipped with Bluetooth that allows the user to connect their device wirelessly for audio playback.
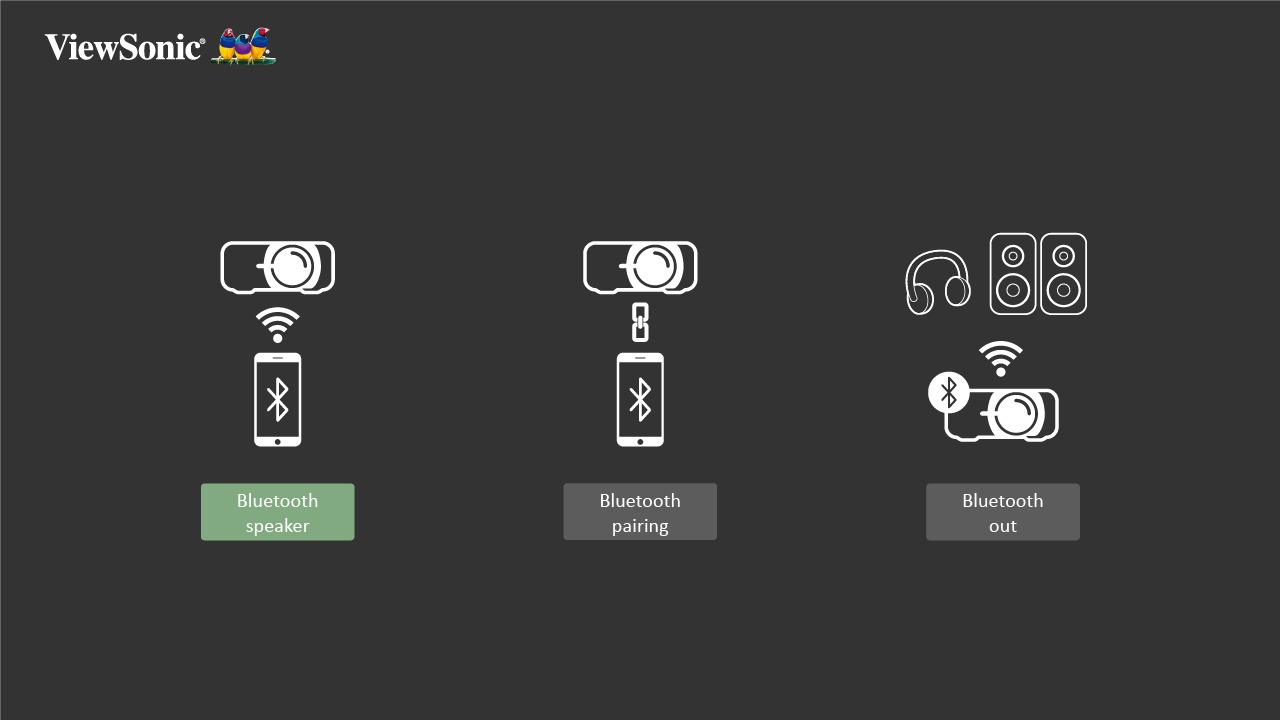
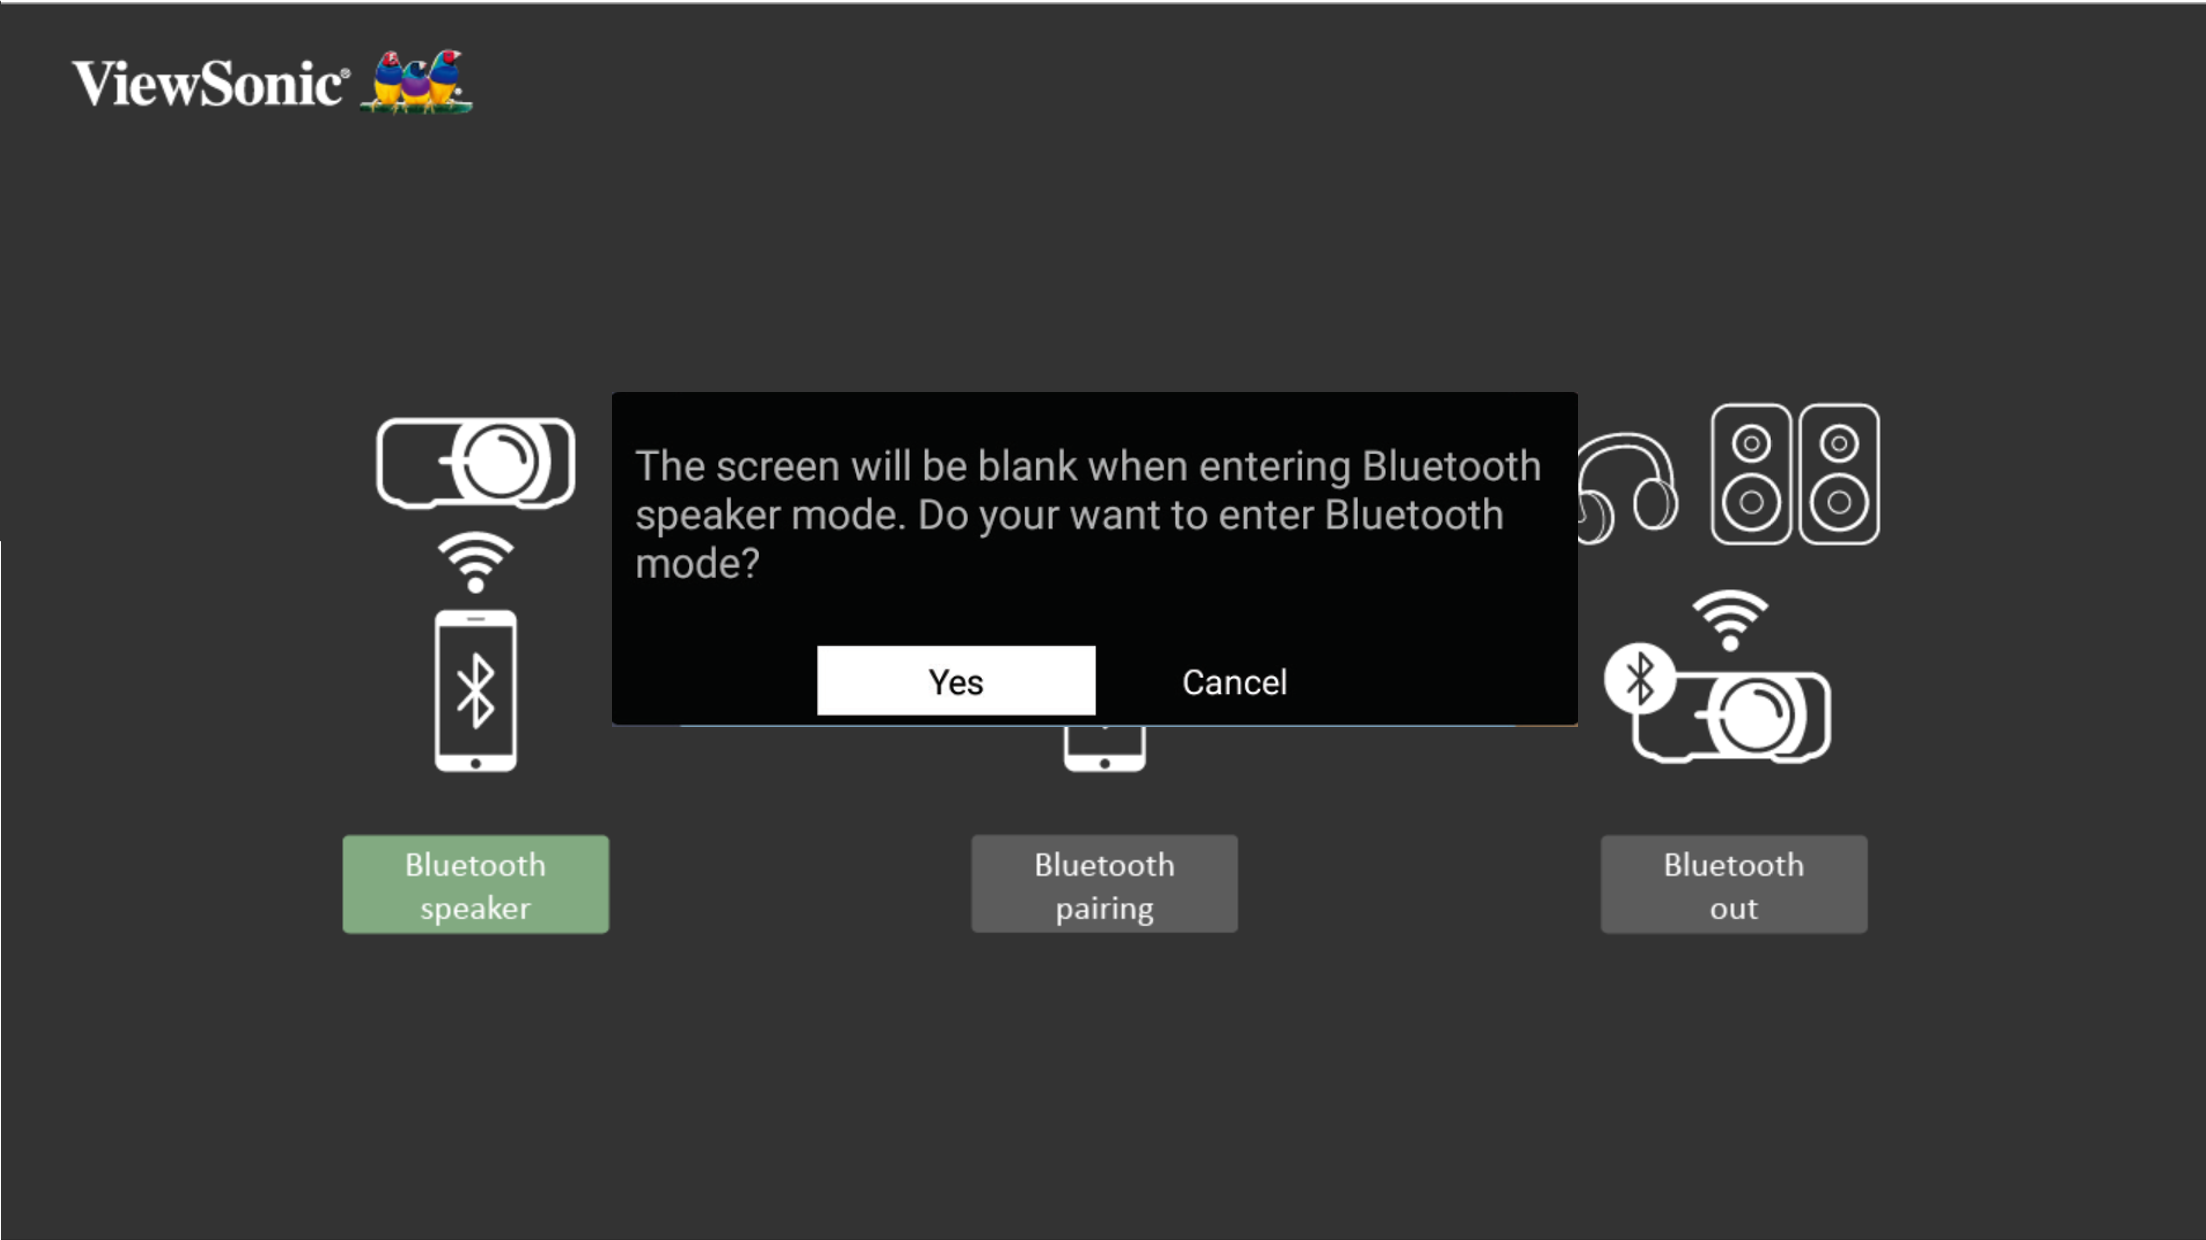
To connect and pair your device:
Connect the projector to external headphones or speakers that support Bluetooth.
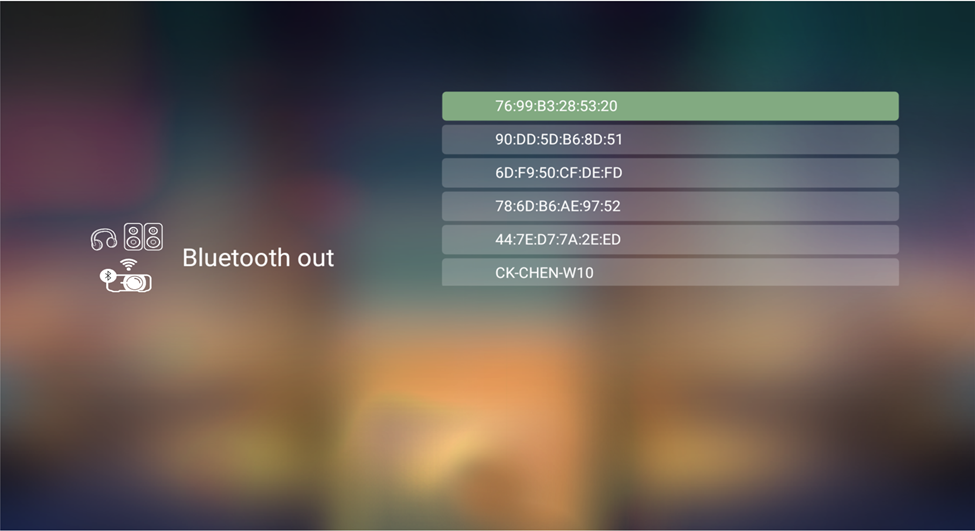
To connect and pair your device:
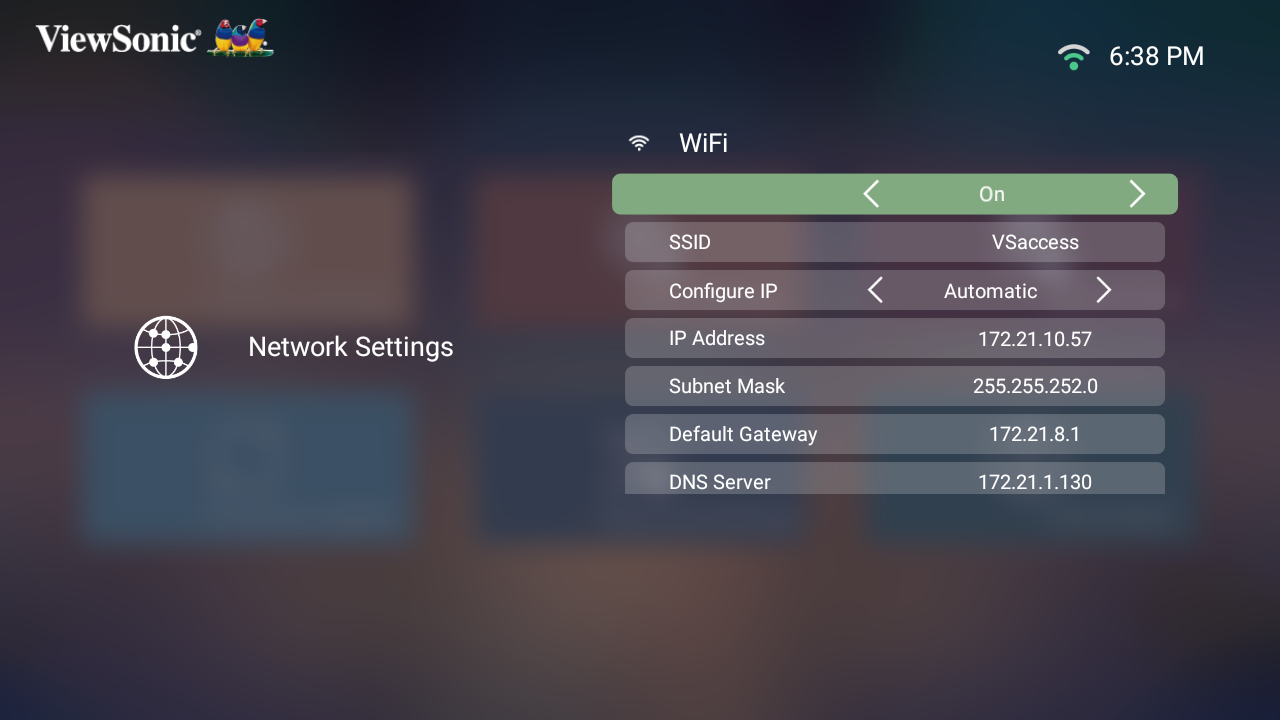
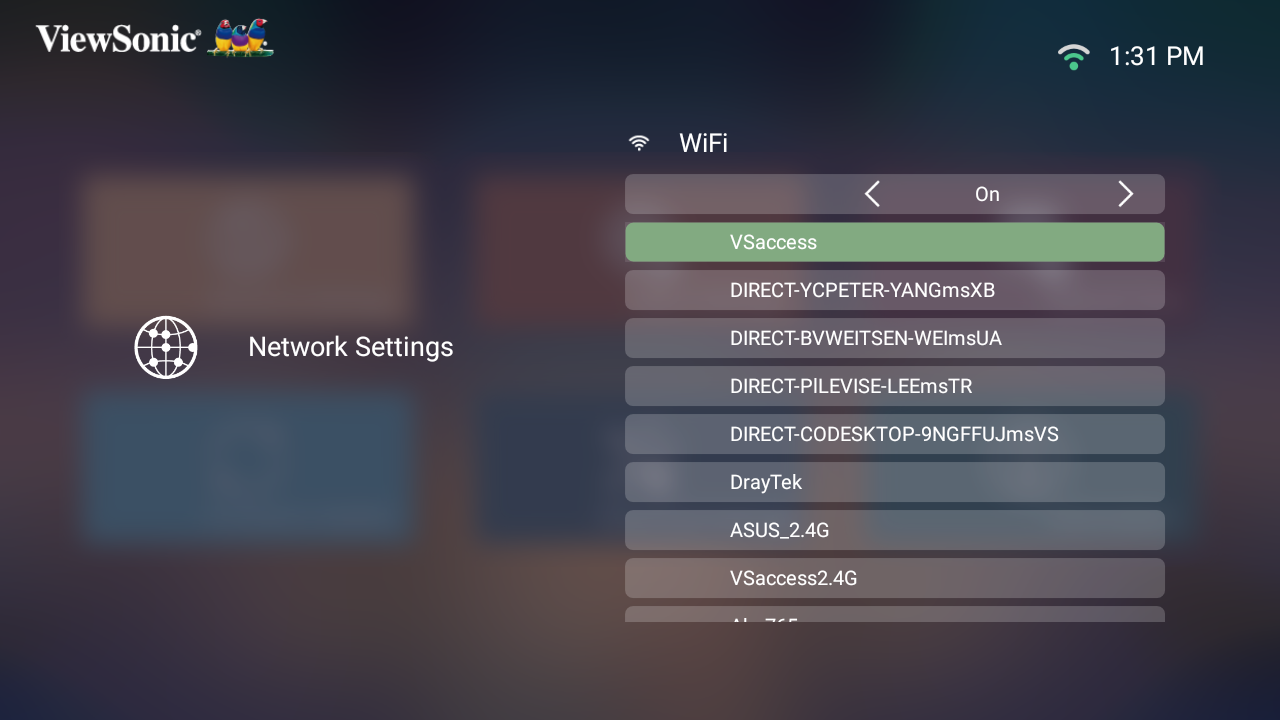
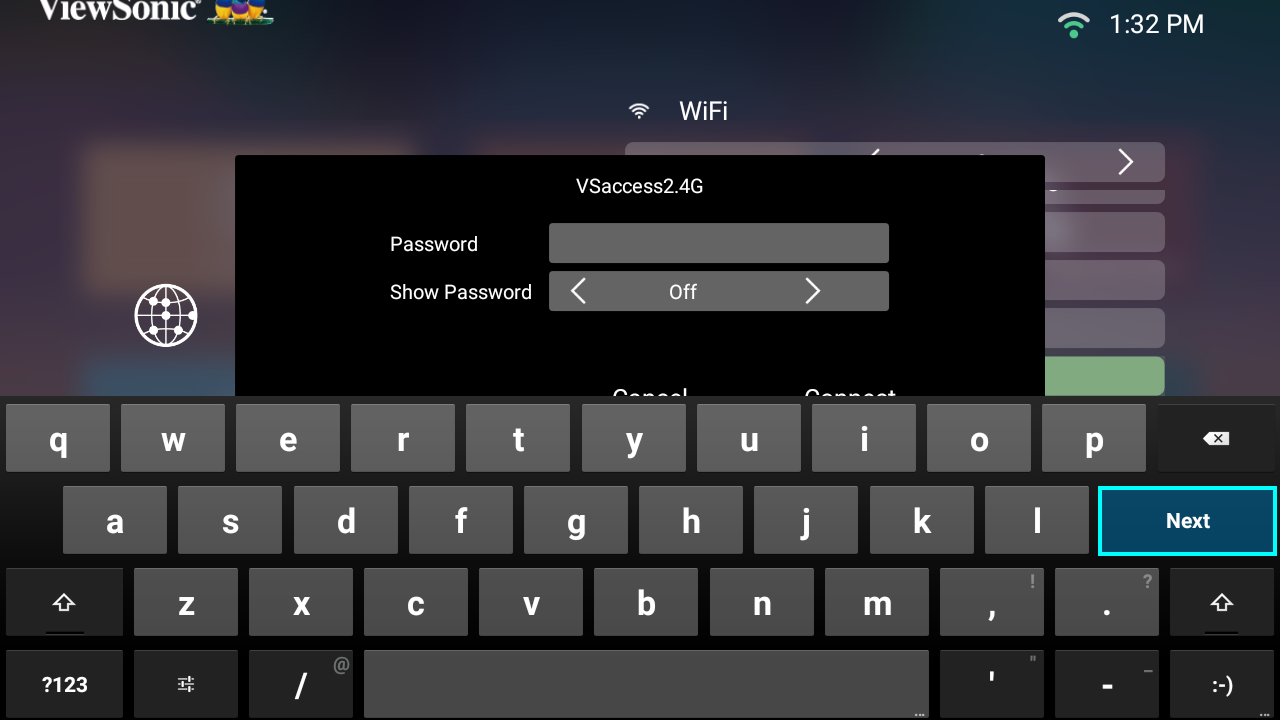
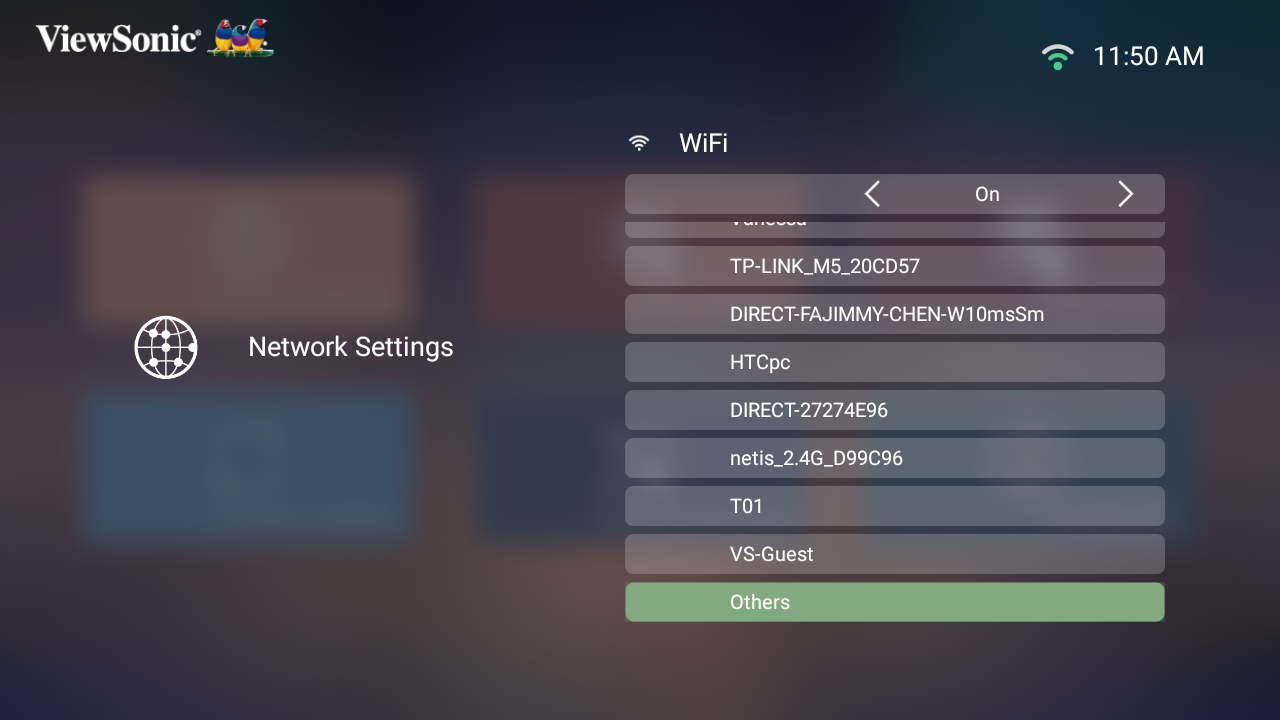
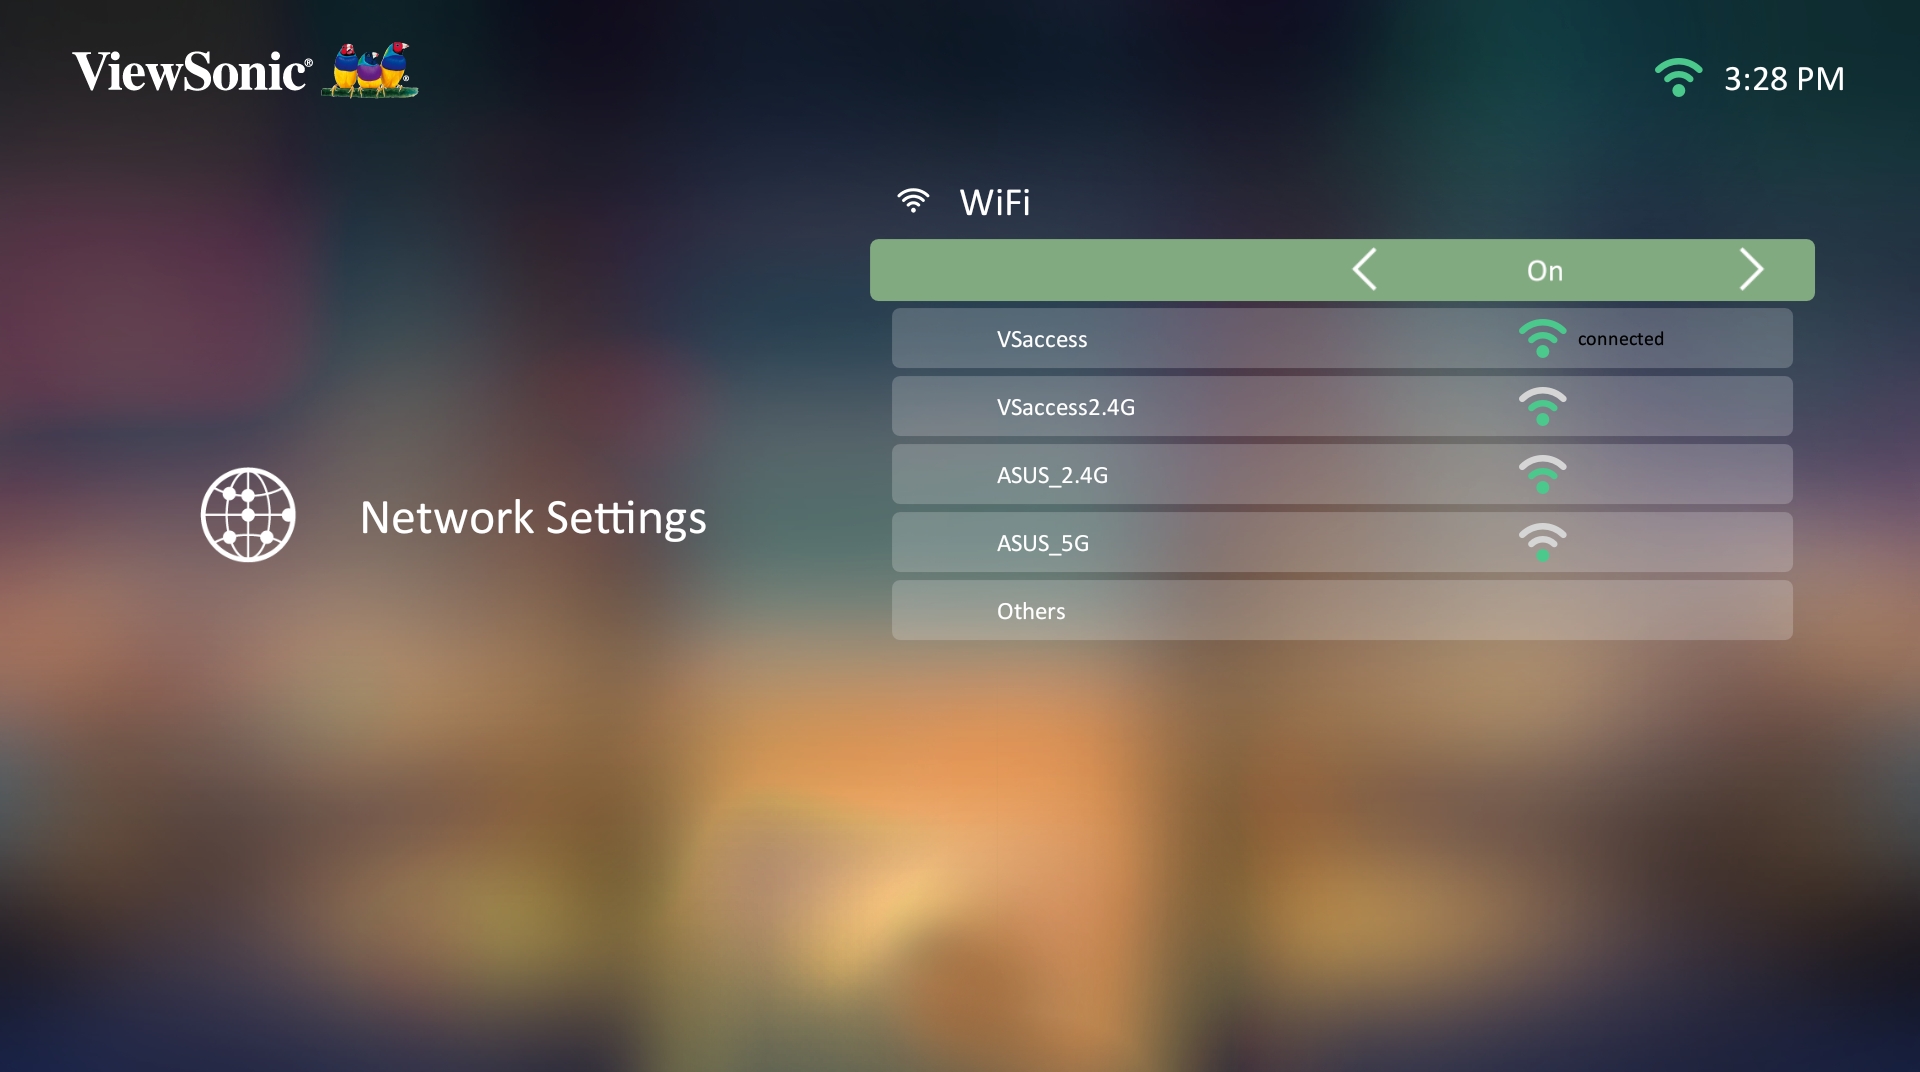
To connect to a Wi-Fi network:
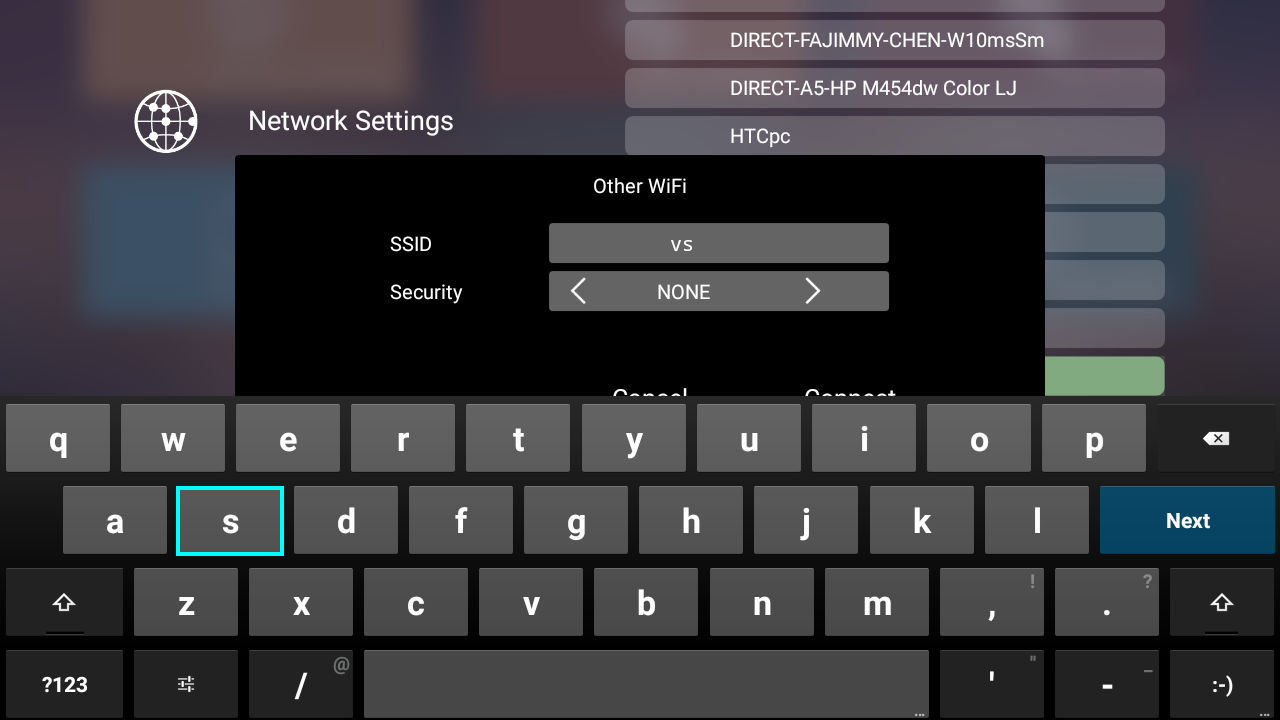
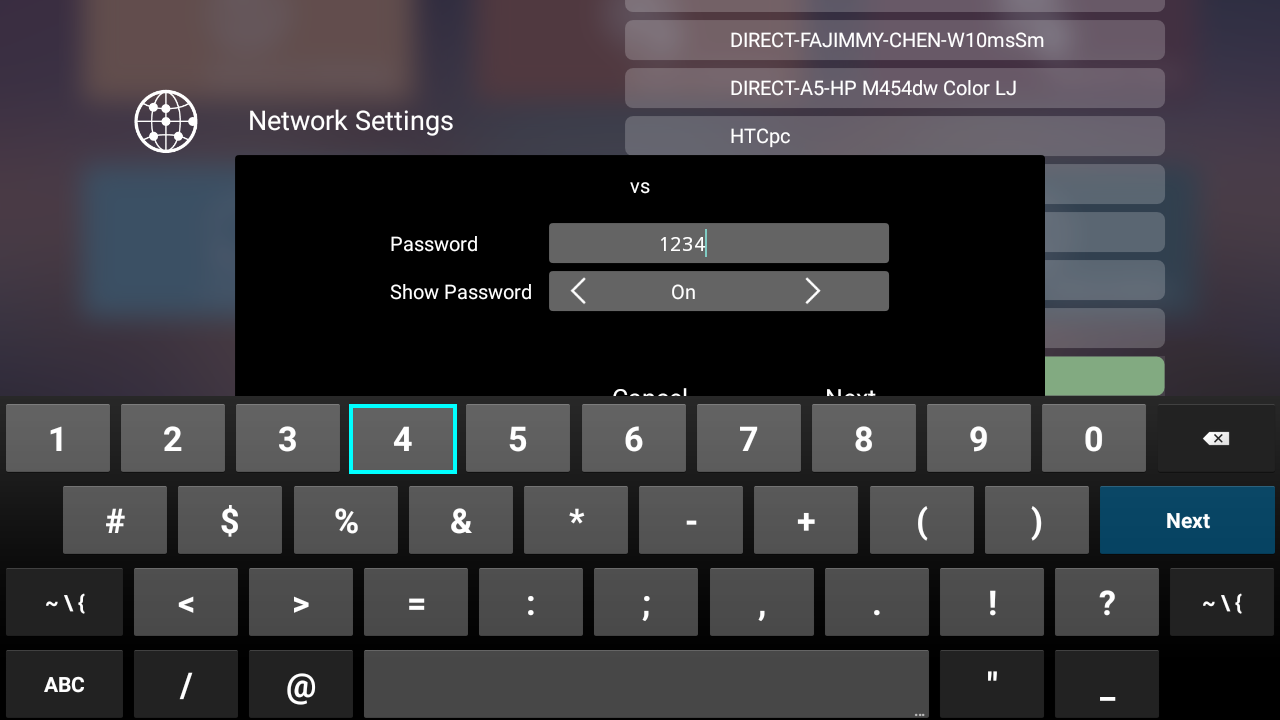
Custom SSID
Screen Mirroring provides a 5 GHz Wi-Fi connection for users to mirror the screen on their personal device.
Note: Ensure your device is connected to the same network as the projector.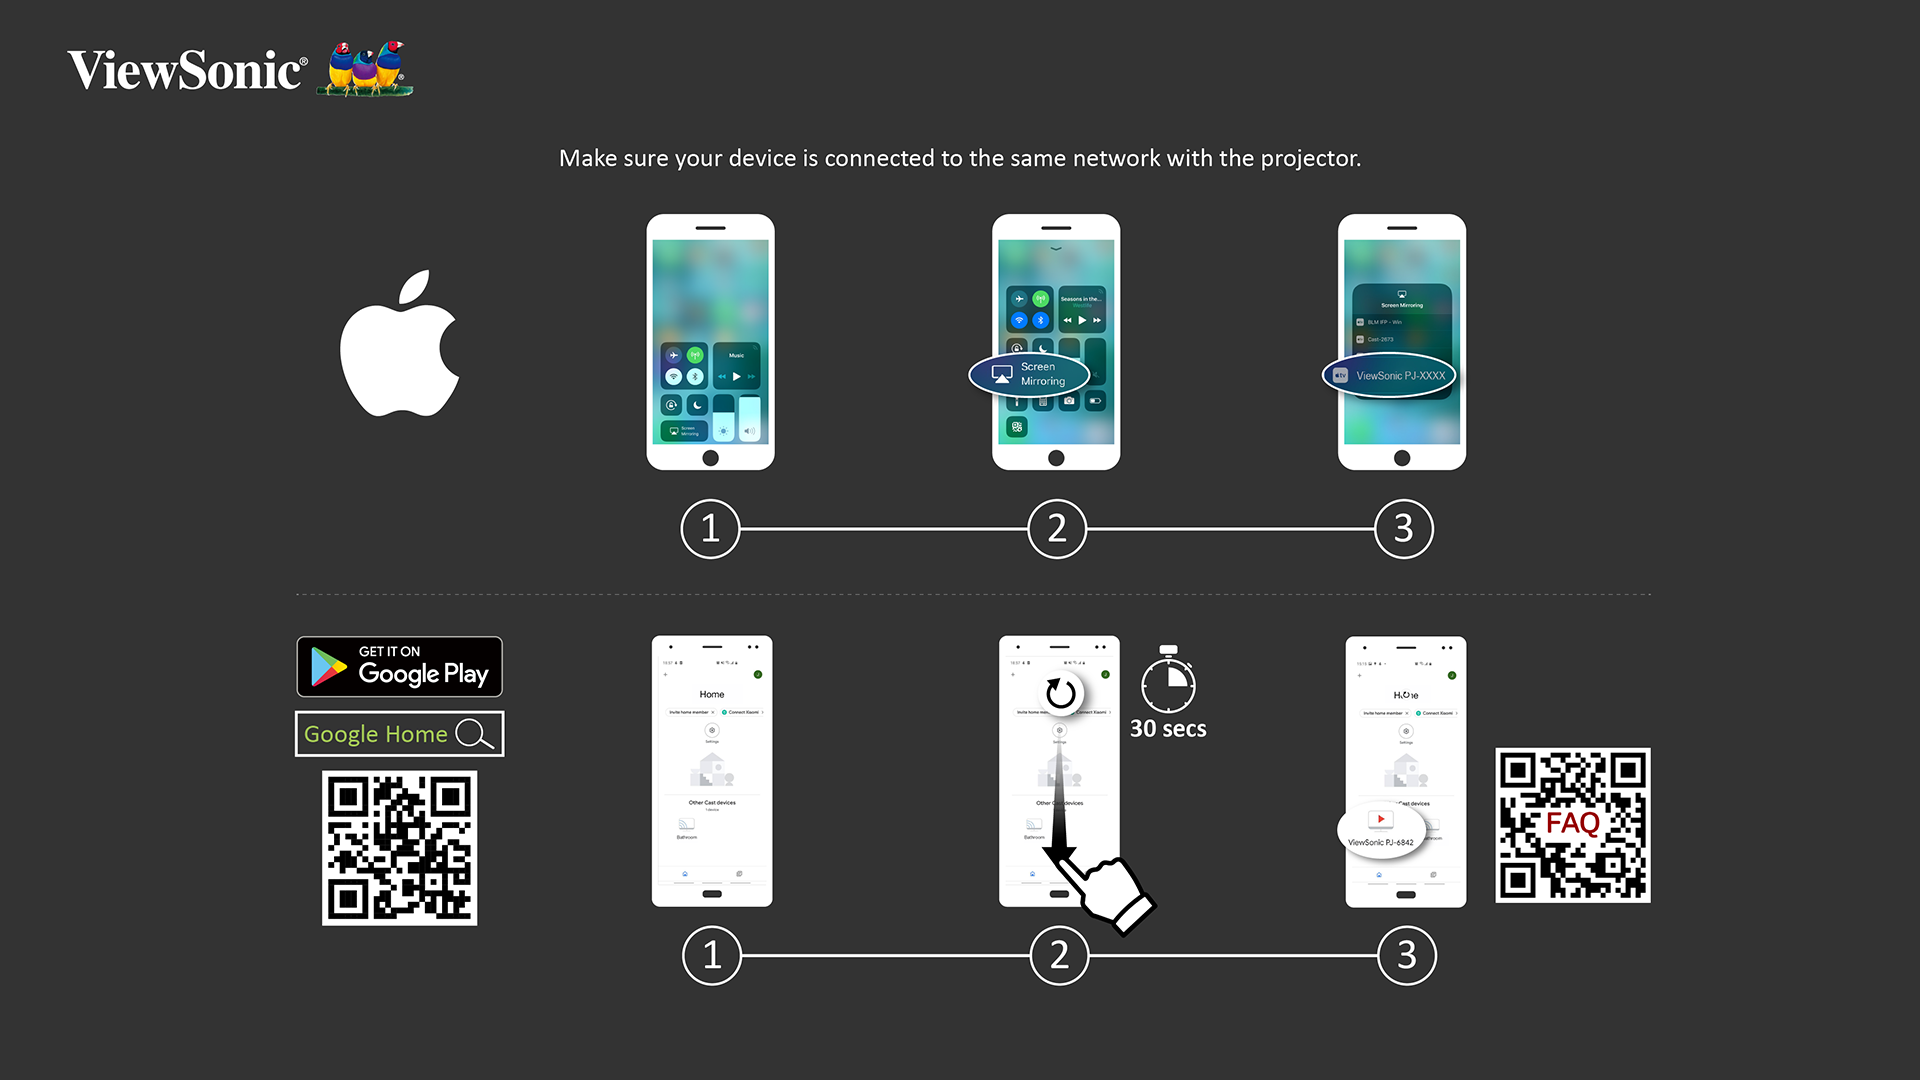
Note: Some Android devices support direct “Casting”. If your device does, go to the Casting feature and choose “ViewSonic PJ-XXX” from the list of available devices. You can also scan the FAQ QR code and follow the steps to directly cast your Android device.
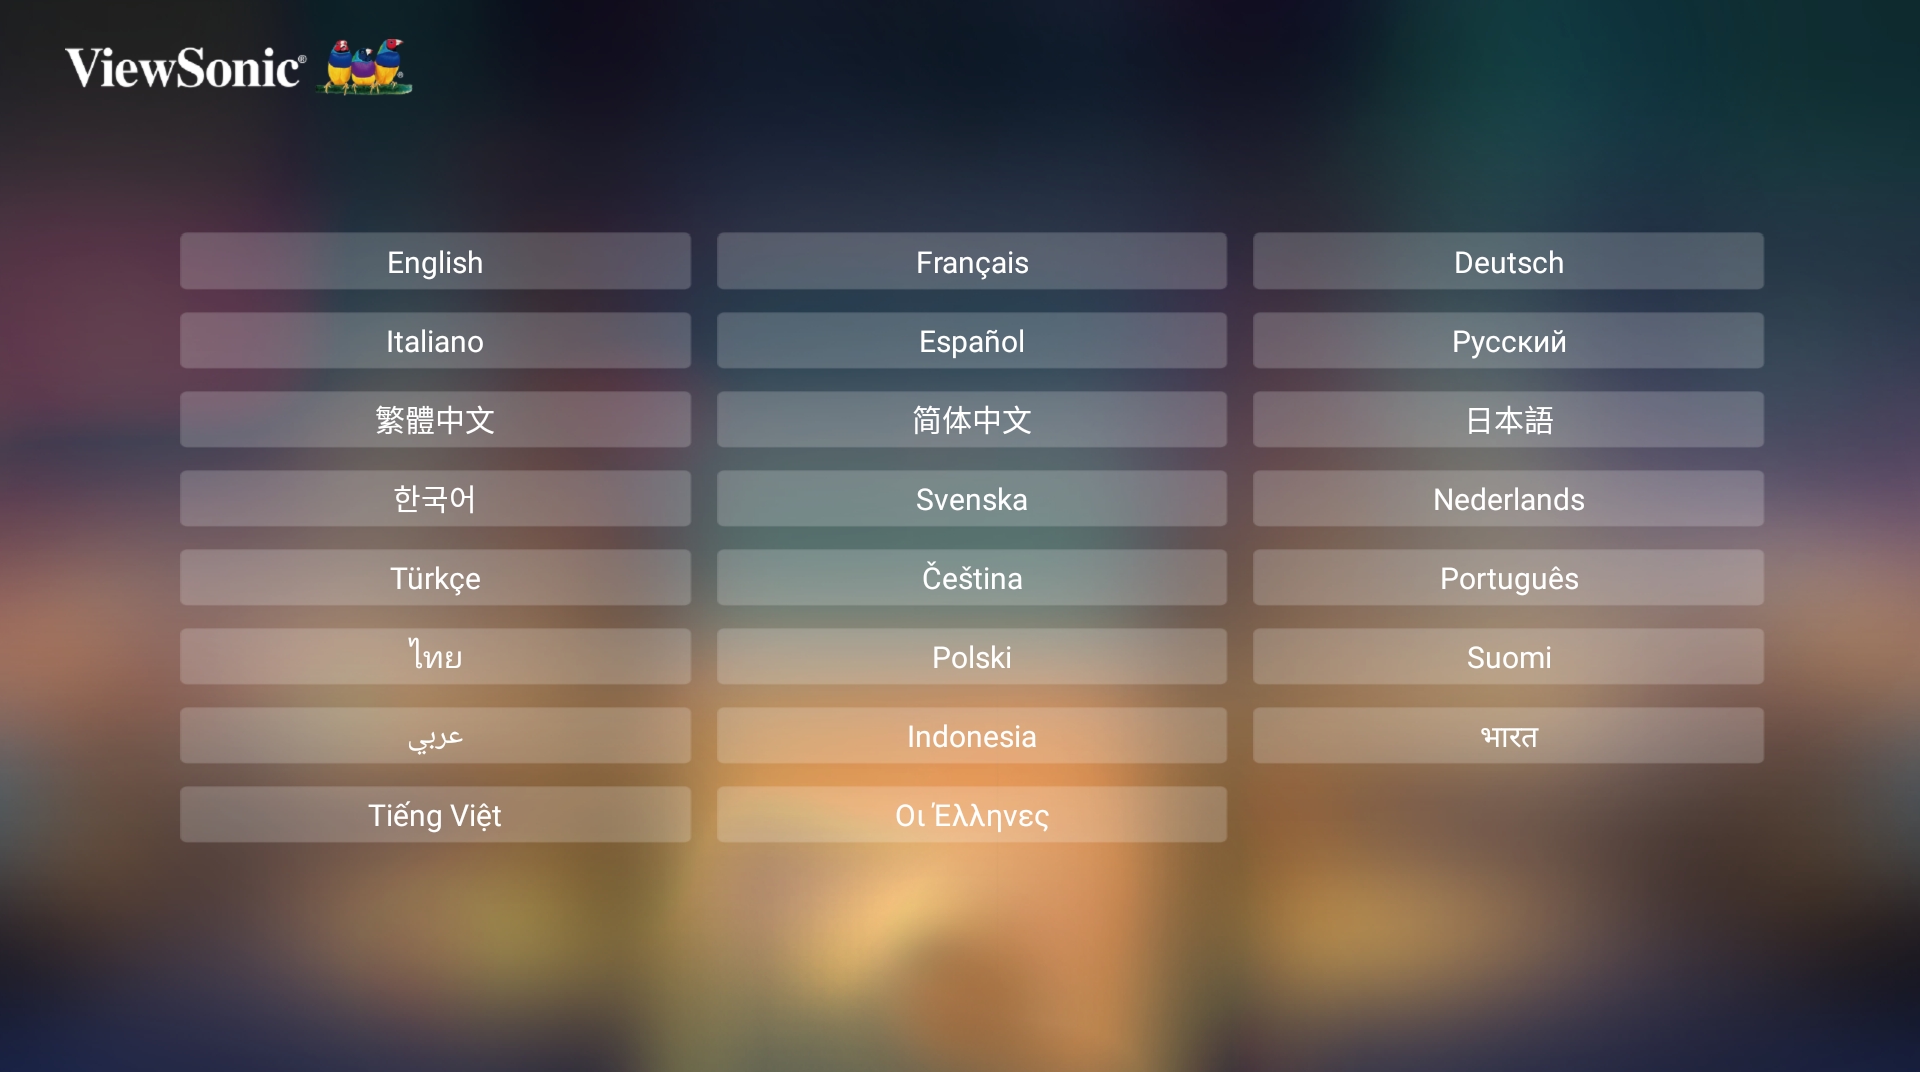
If the projector is activated for the first time, you will need to select your Preferred Language, Projection Orientation, and Network Settings. Follow the on-screen instructions using the OK and Up/Down/Left/Right buttons on the remote control. When the "Finish screen" appears, this indicates the projector is ready to use.
Select the desired language and press OK to confirm the selection.
Select the preferred projection orientation and press OK to confirm the selection.
Select one of the available Wi-Fi options.
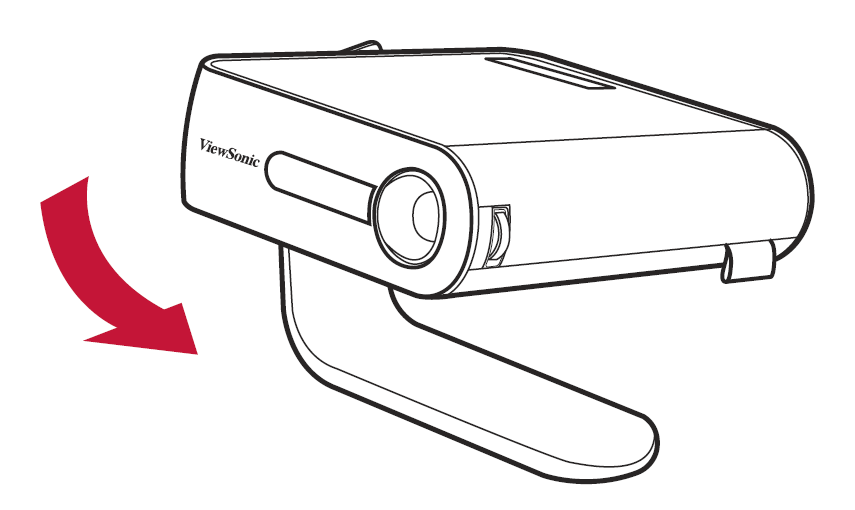
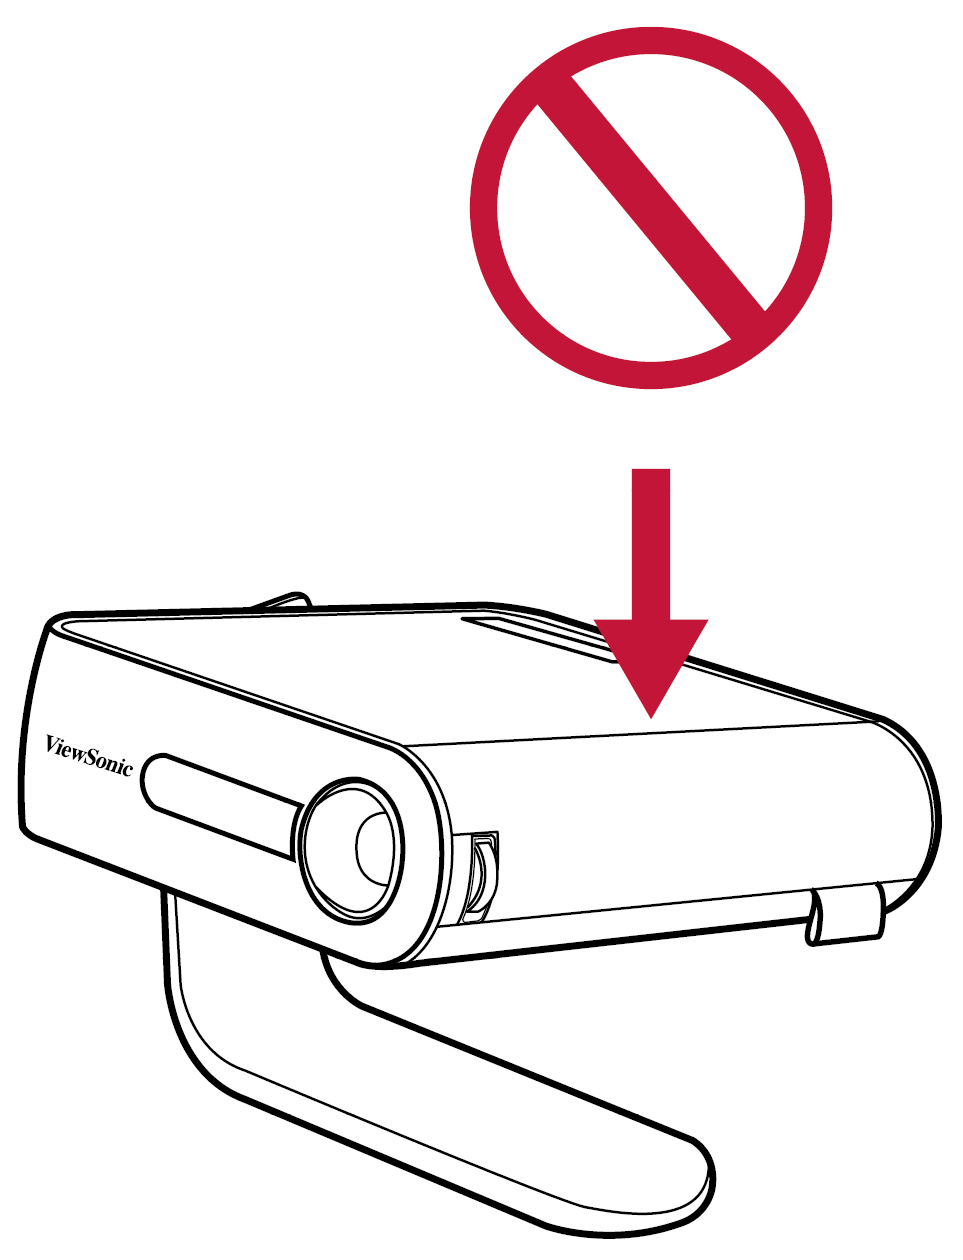
The projector is equipped with one (1) Smart Stand. Adjusting the stand will change the projector’s height and the vertical projection angle. Carefully adjust the stand to fine tune the projected image’s position.
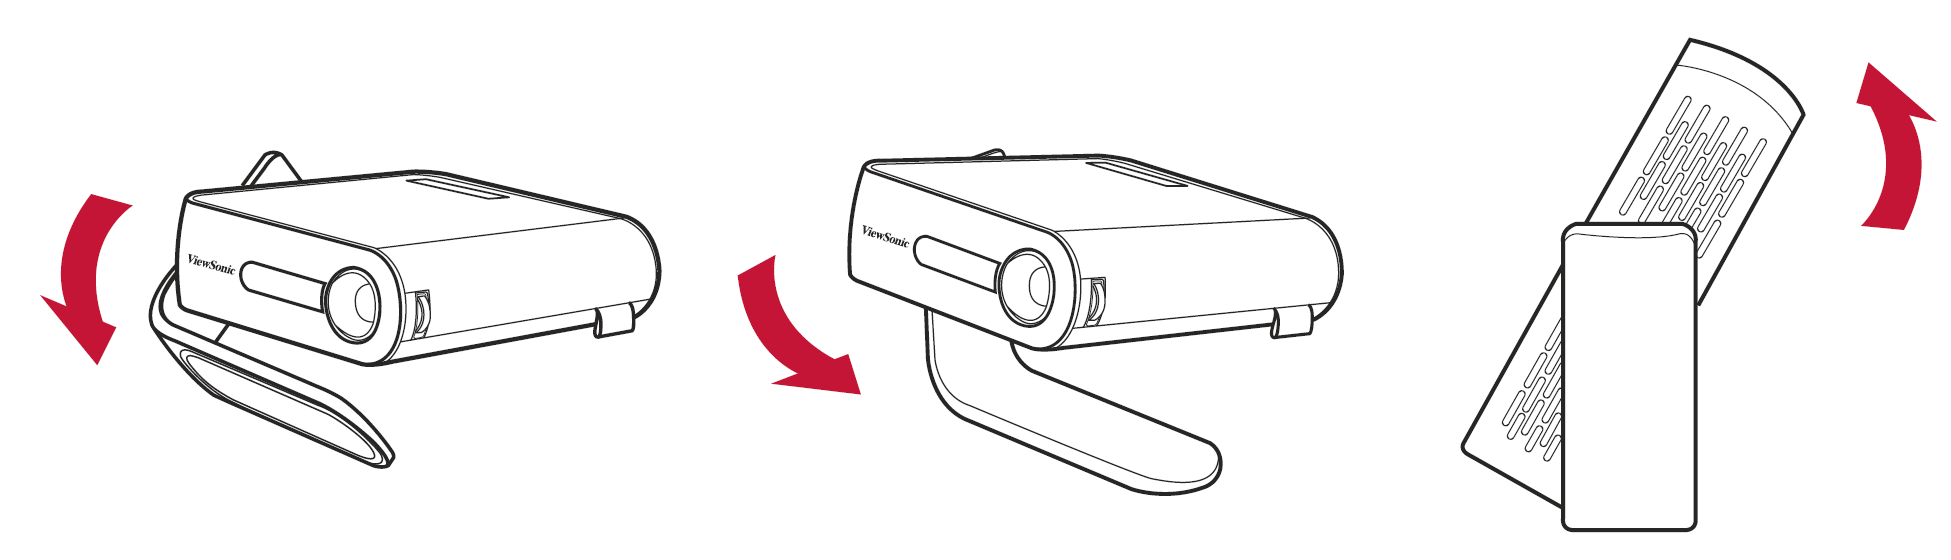
NOTE: If the projector is not placed on a flat surface or the screen and the projector are not perpendicular to each other, the projected image can become trapezoidal. However, the “Auto Vertical Keystone” function will correct the issue automatically.
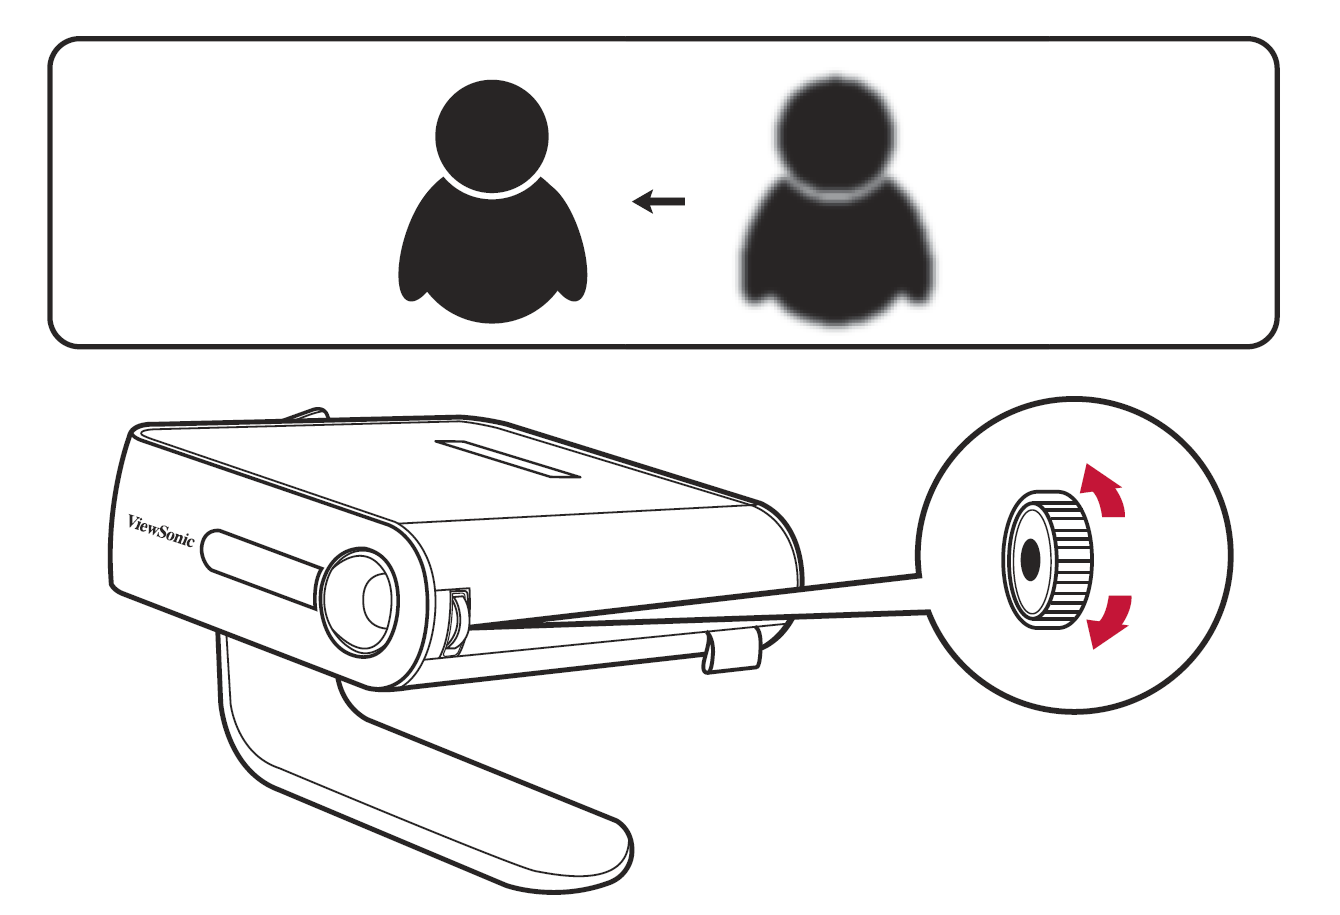
To adjust the image focus of the on-screen image, slowly move the focus ring upwards or downwards.
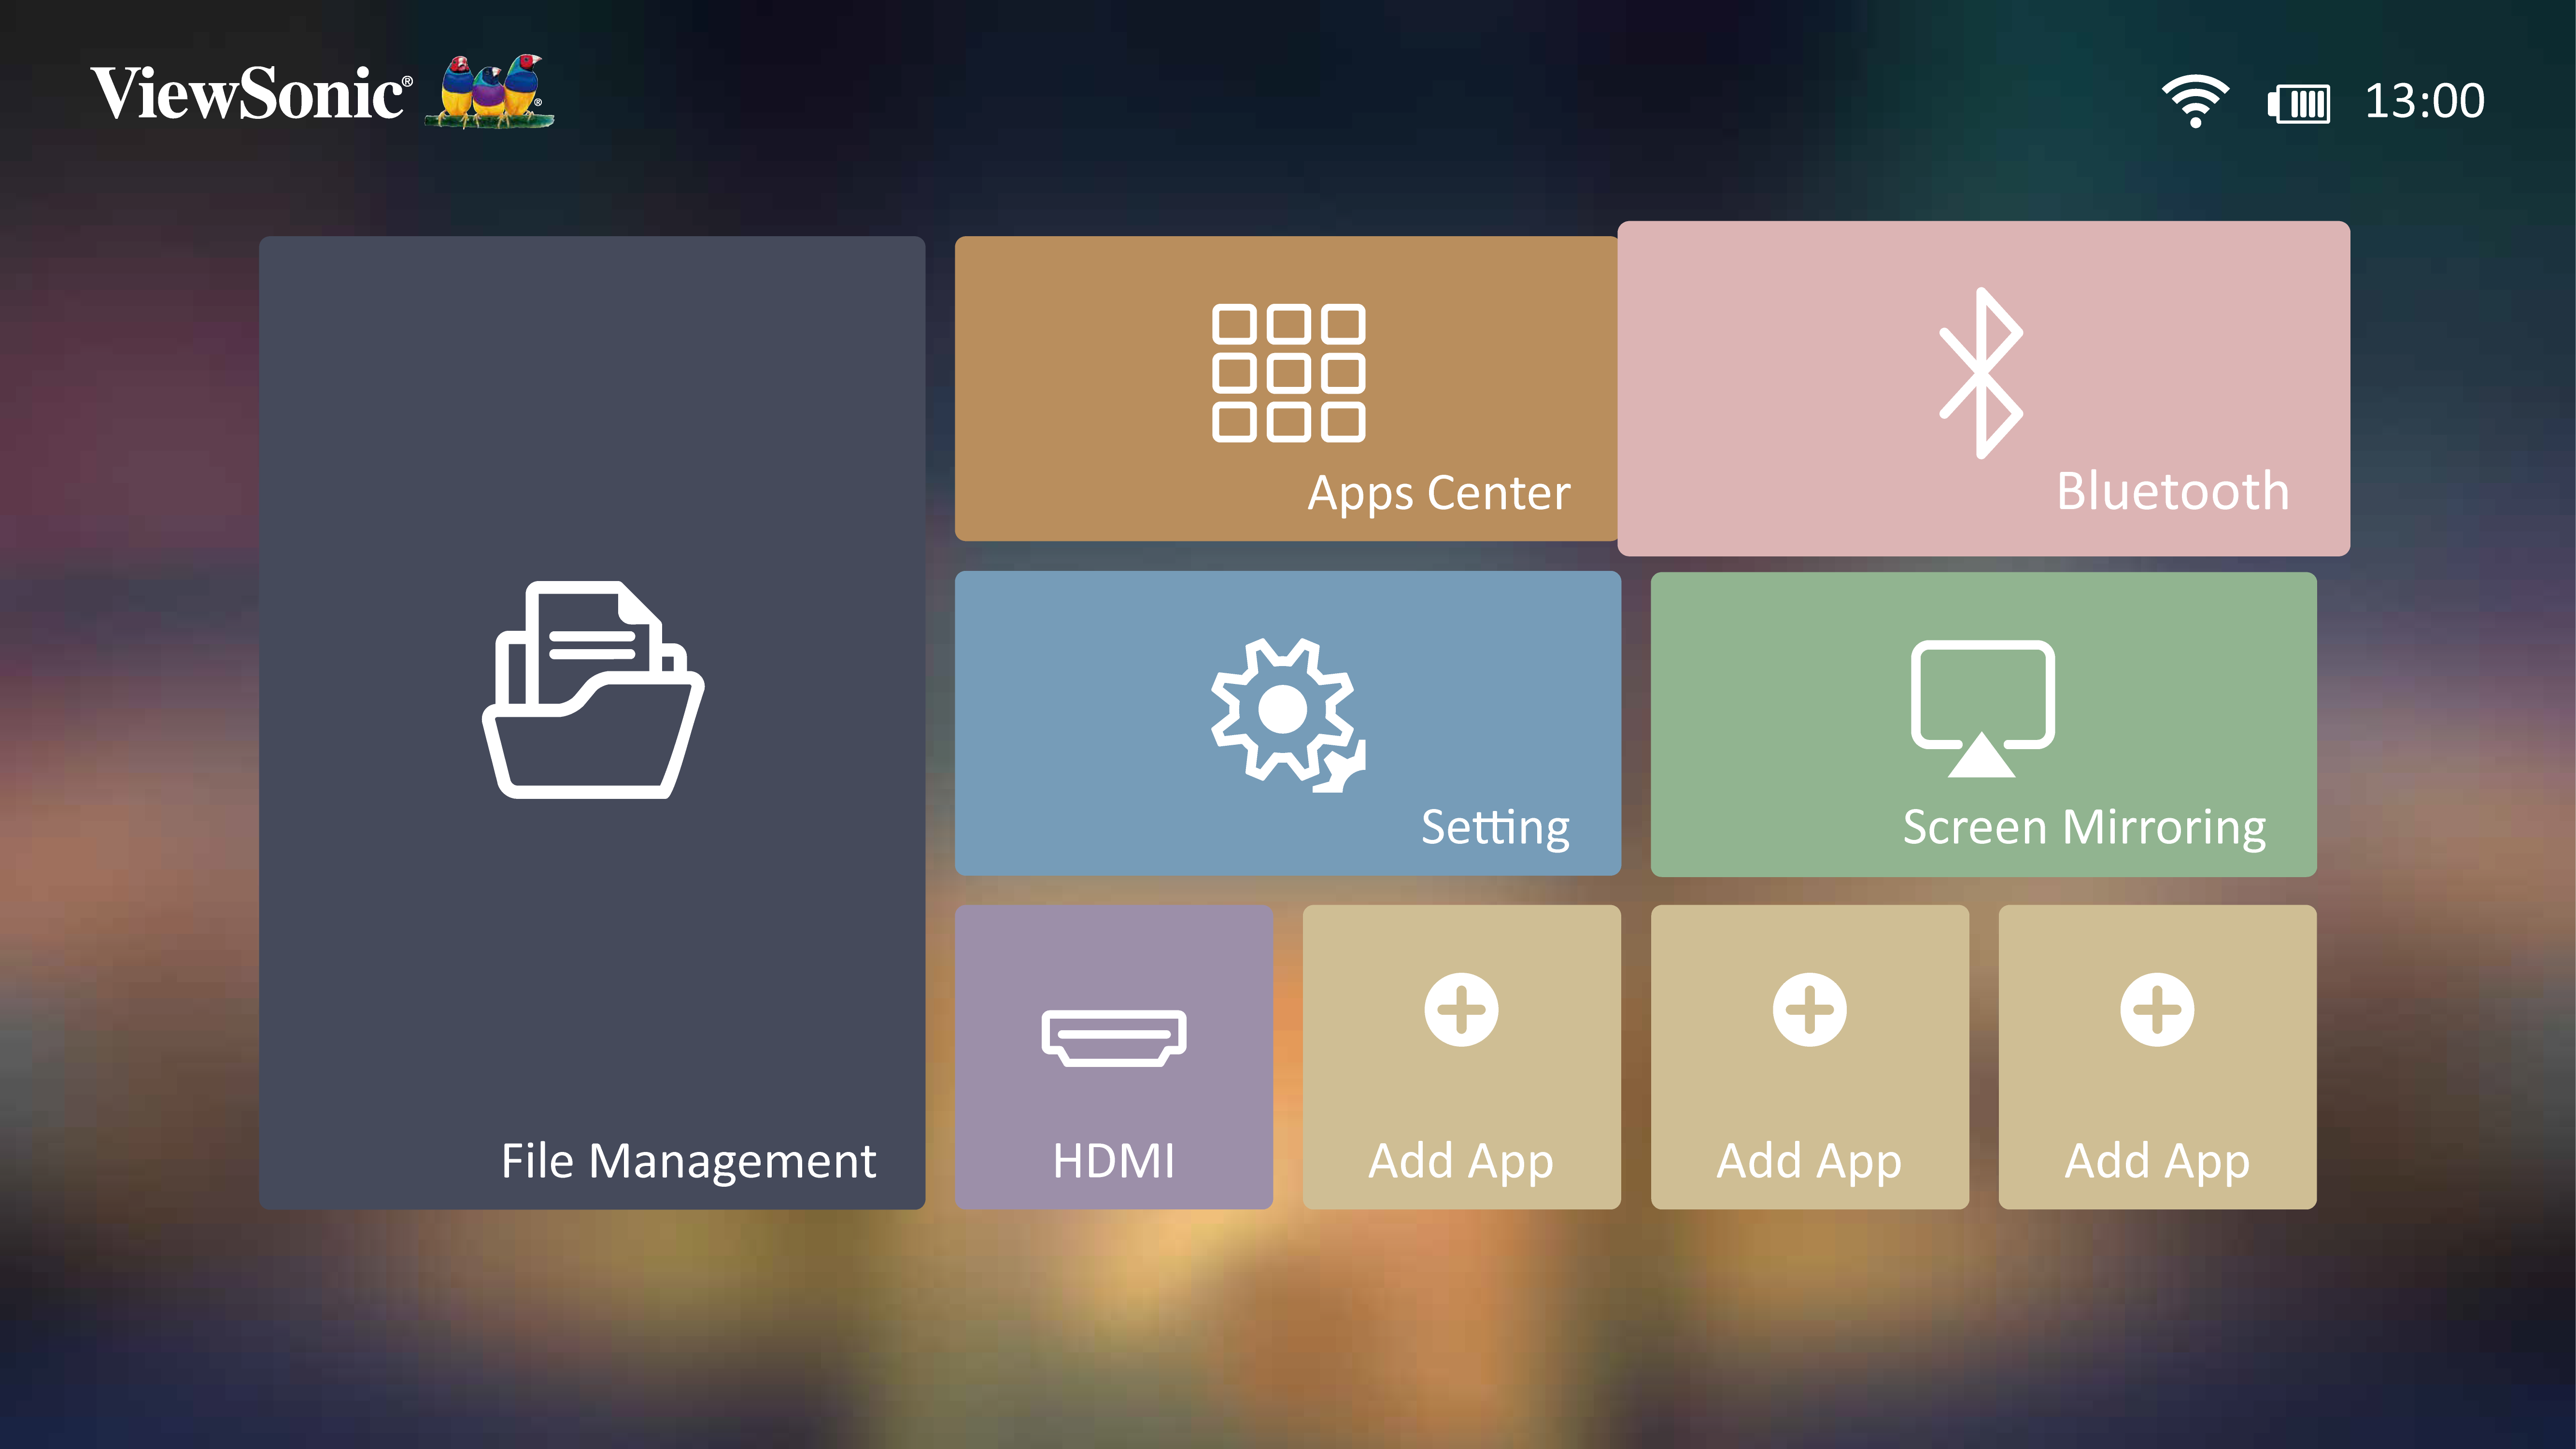
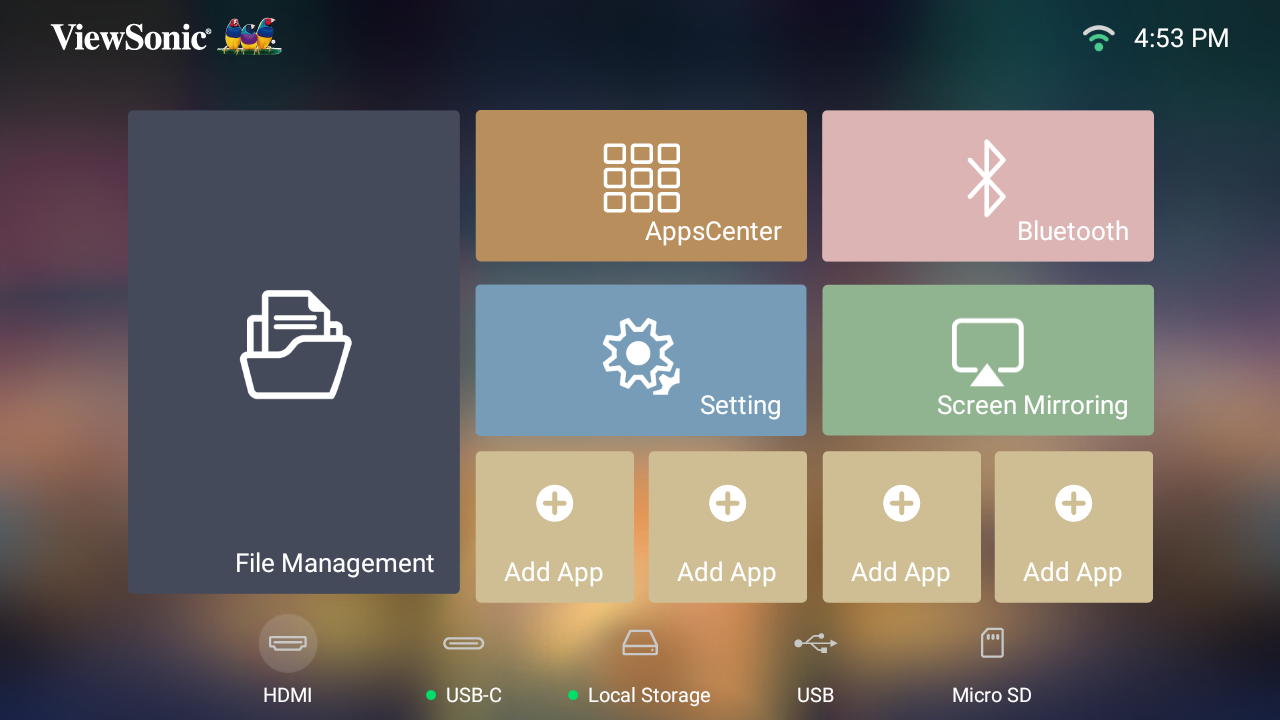
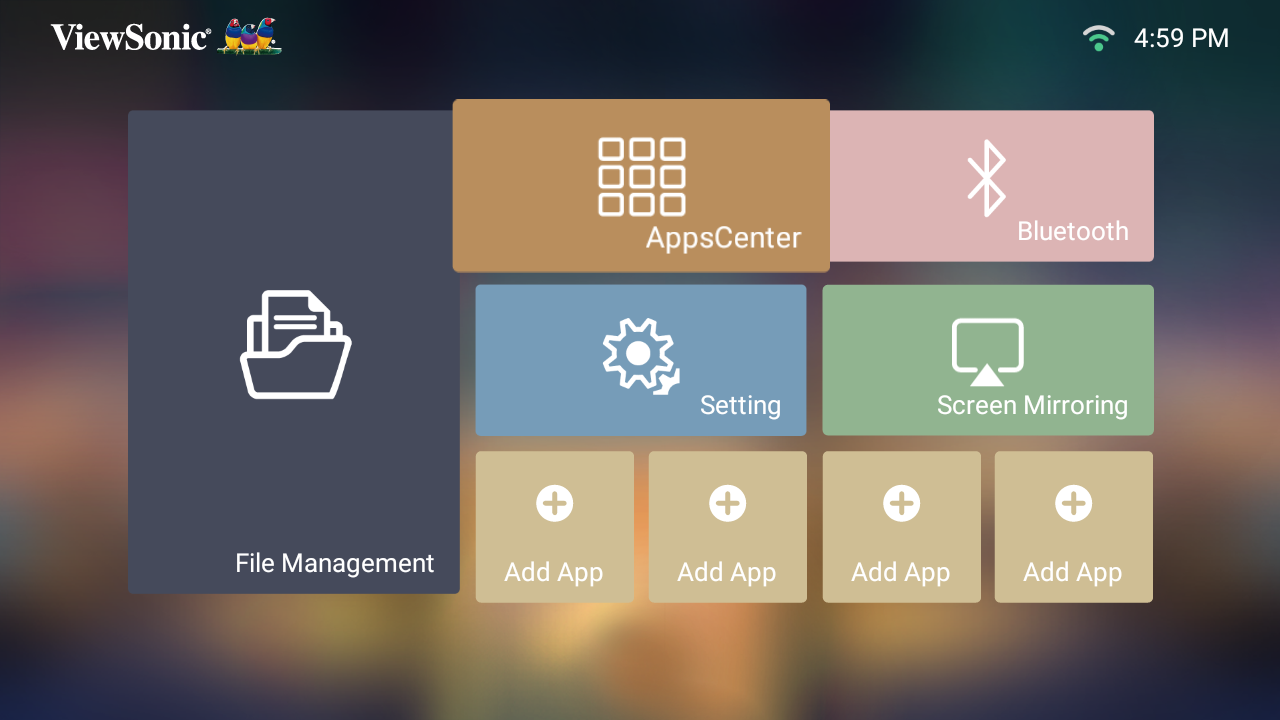
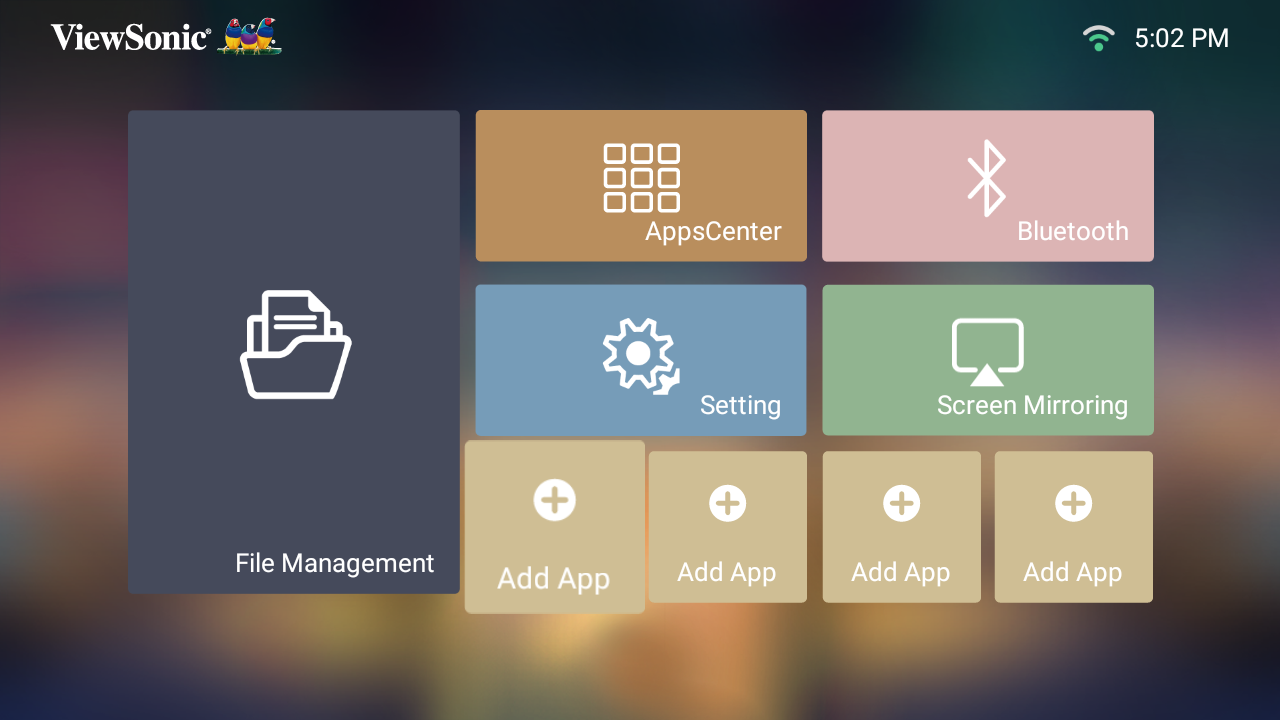
The Home Screen is displayed every time you start the projector. To navigate the Home Screen, simply use the directional buttons on the remote control. You can return to the main Home Screen at any time by pressing the Home button on the remote control, regardless of what page you are on.
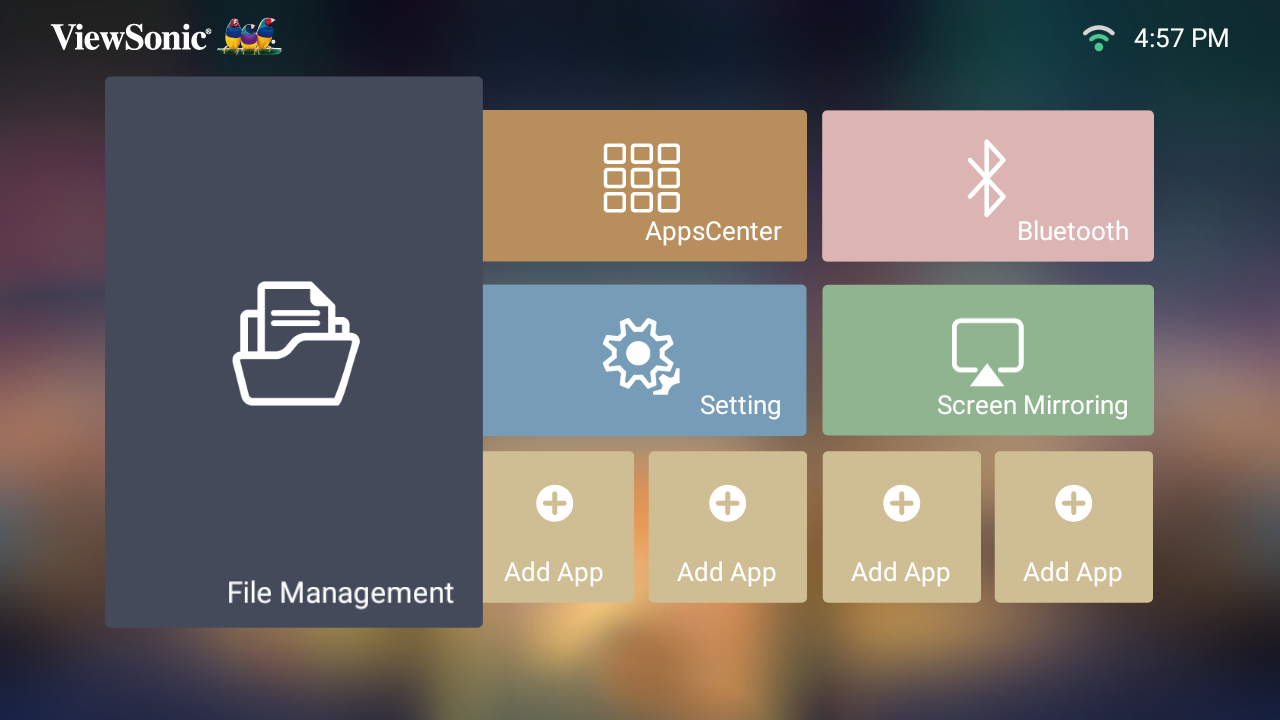
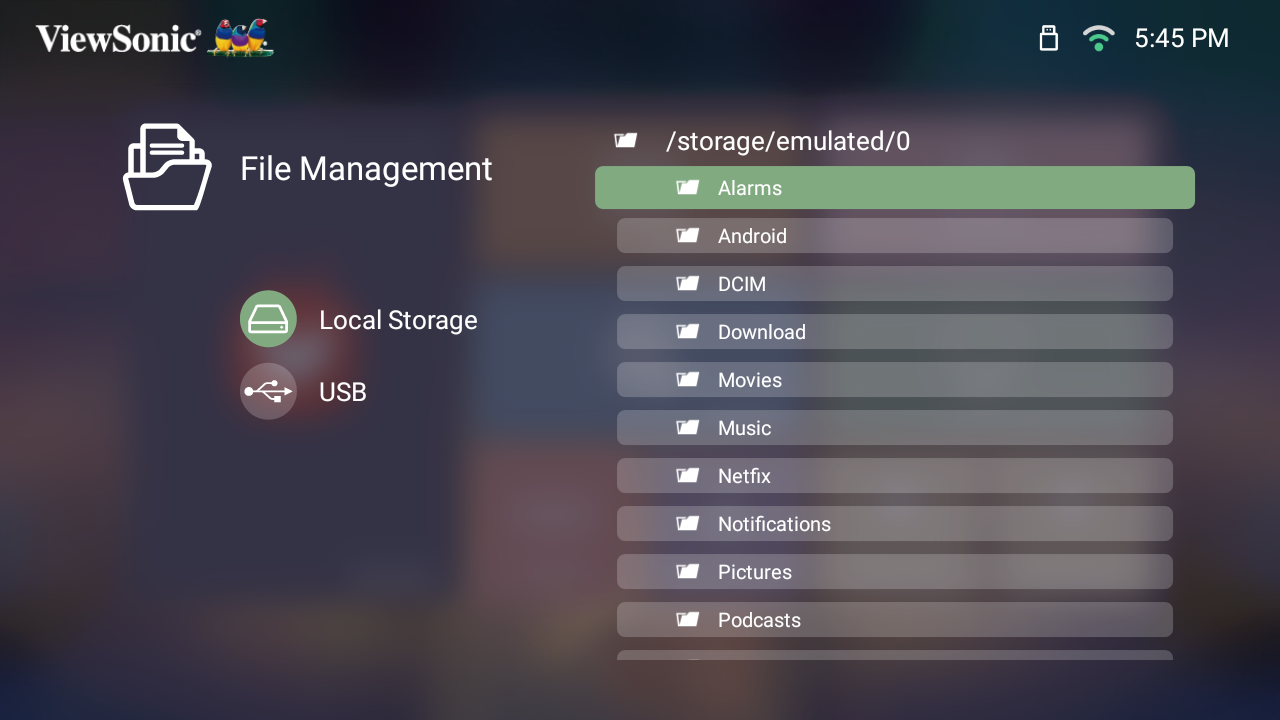
Easily manage files and folders.
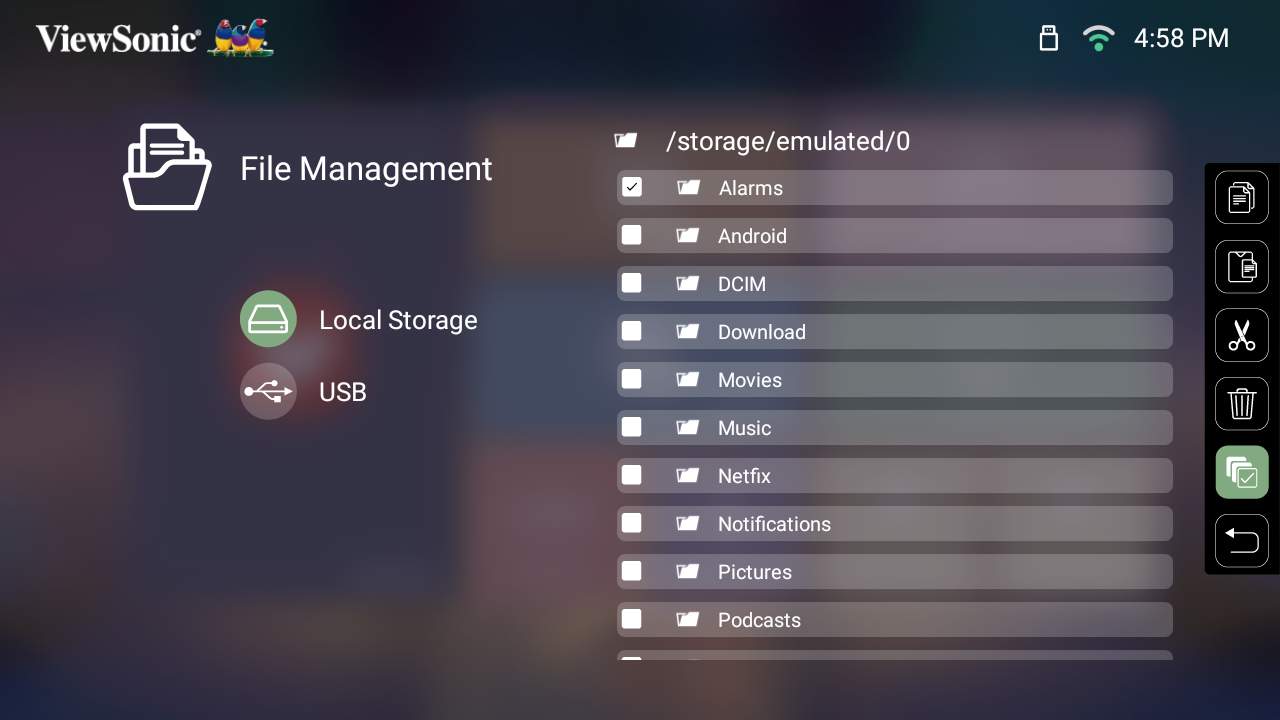
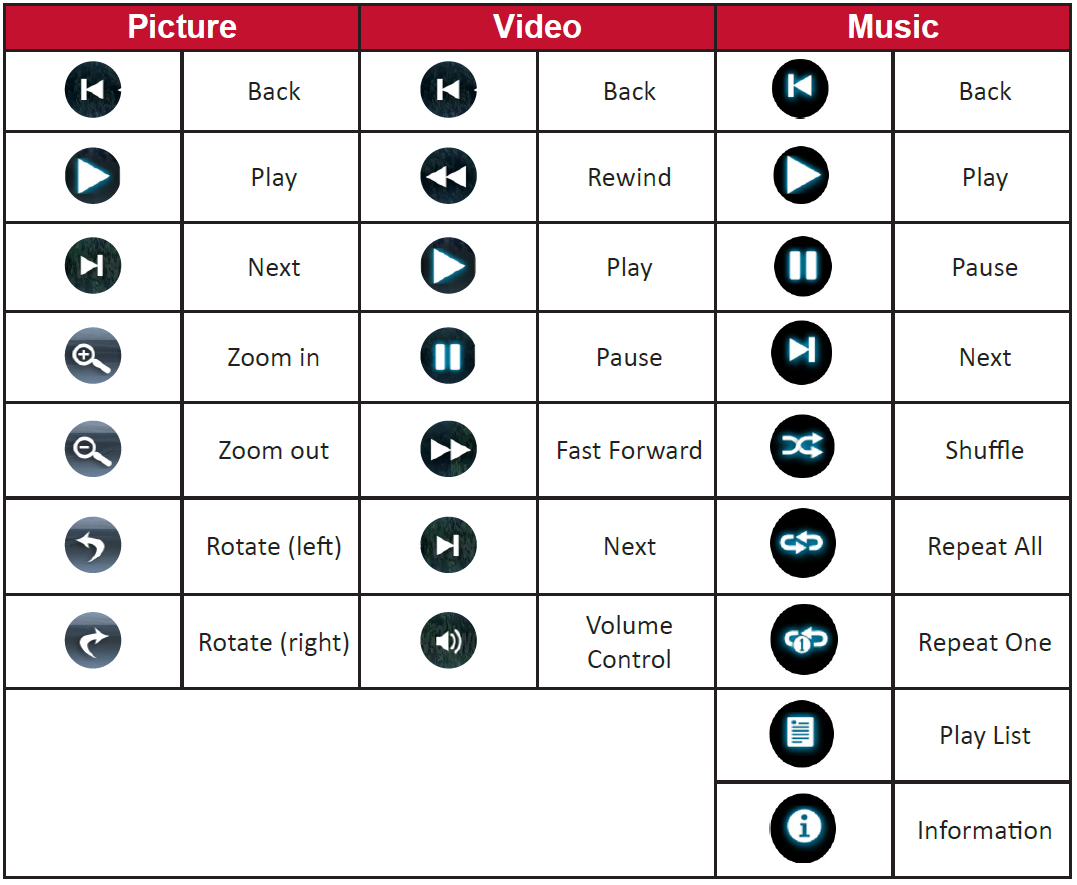
The Control Bar buttons will appear on screen if a video, music, or photo file are selected to be opened.
Tips for using USB
When using USB for reading and/or storage please keep in mind the following:
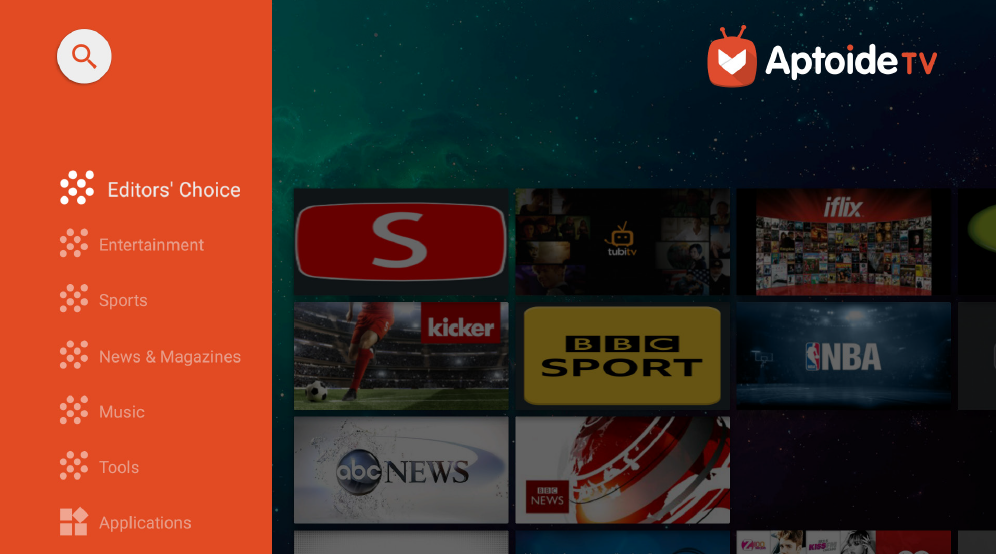
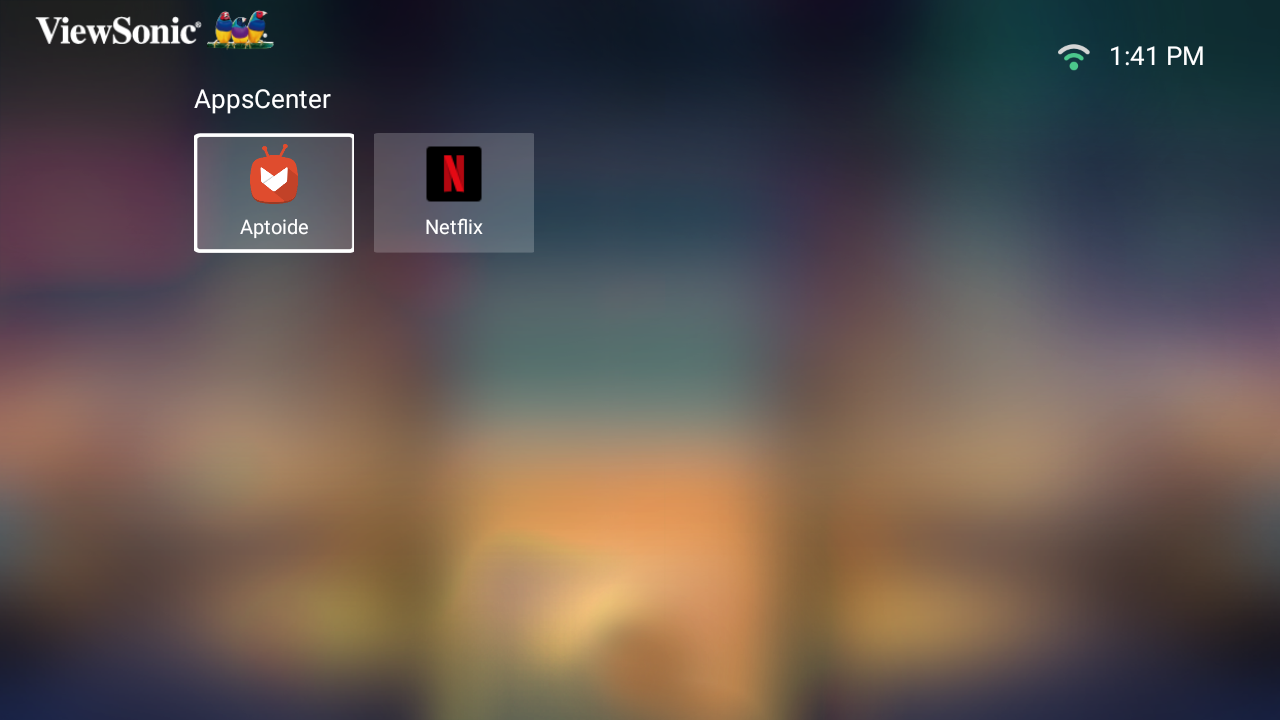
View, launch, and uninstall Apps.

The projector is pre-loaded with the Aptoide store, which allows users to download and install different Apps.
The projector is equipped with Bluetooth that allows the user to connect their device wirelessly for audio playback. For more information, see Connecting to Bluetooth
Under Setting you can adjust Network, Basic, and Advanced Settings, Date & Time, Firmware Update, and view Information.

Adjust Date, Time, Time Zone, and Time Format.
Step 1 - Select Date & Time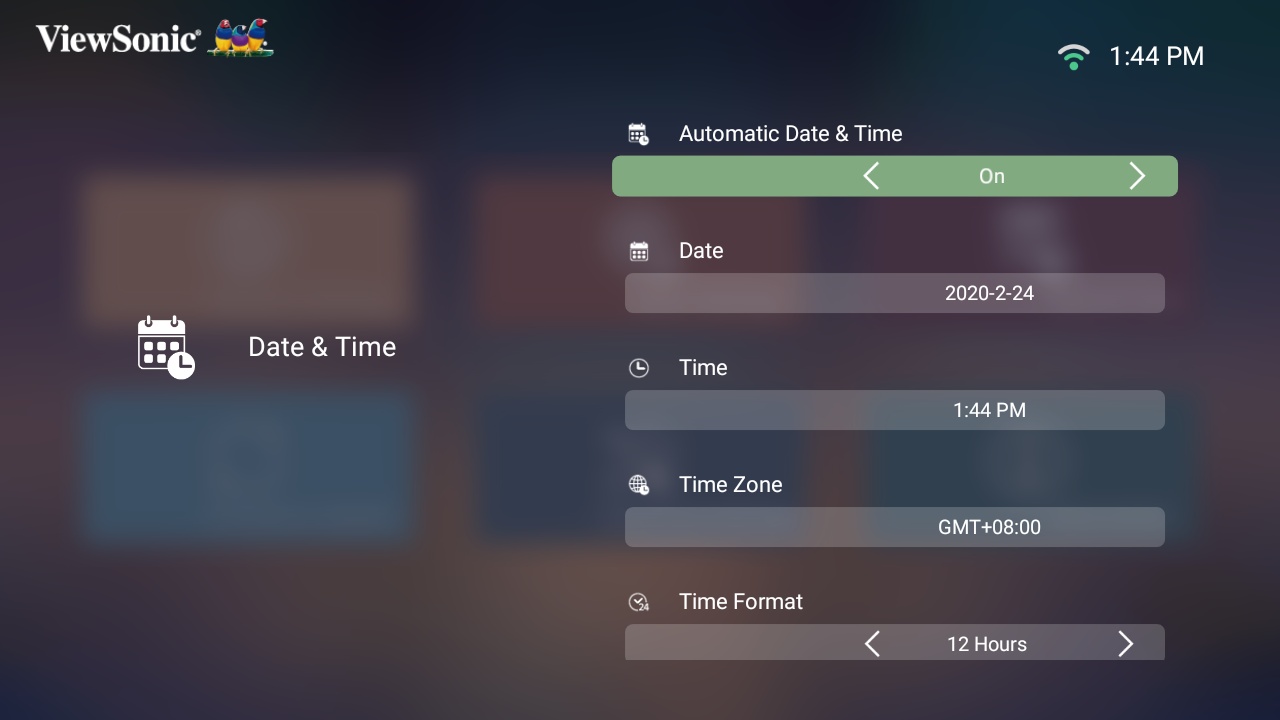
Users can update the firmware Online, or by USB, and check the version number.
Step 1 - Select Firmware Upgrade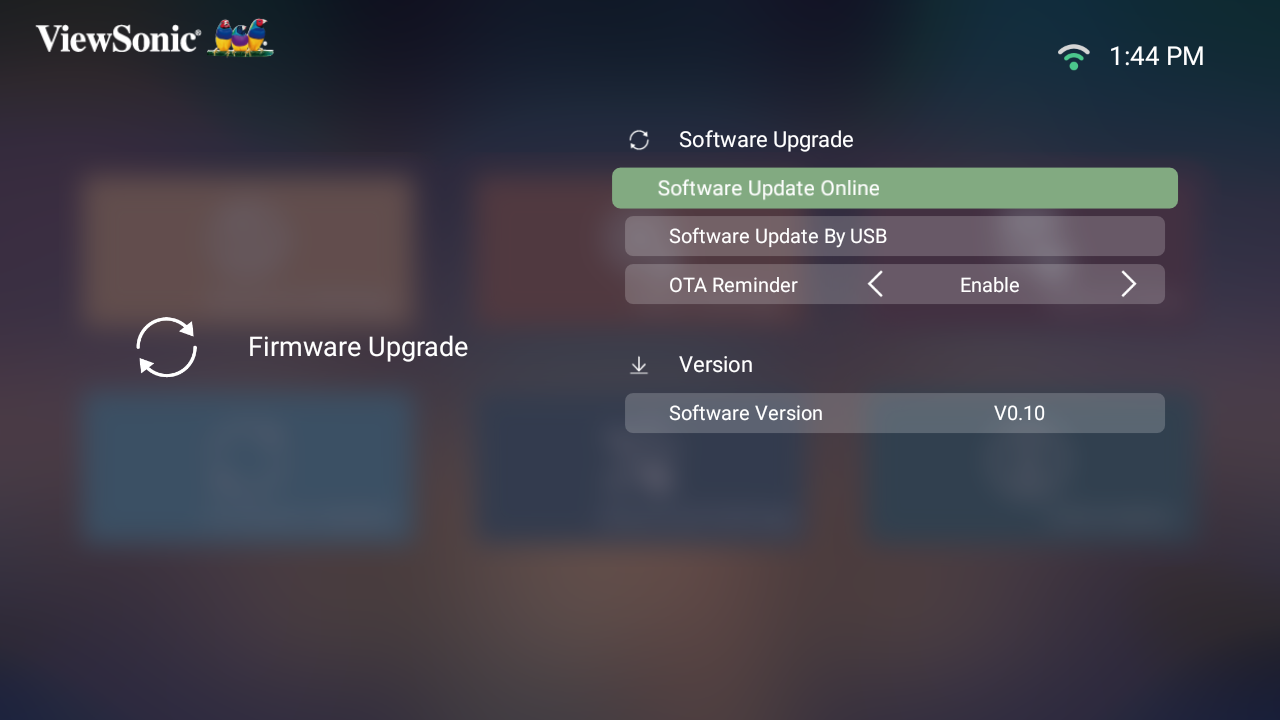
Firmware Update Online
Firmware Update by USB
Add your favorite Apps to the Home Screen.
| Sub-menu | Menu Option | ||
|---|---|---|---|
| Color Mode | Brightest | ||
| TV | |||
| Movie | |||
| Gaming | |||
| User 1 | |||
| User 2 | |||
| Brightness | (-/+, 0~100) | ||
| Contrast | (-/+, 0~50) | ||
| Color Temp | 6500K | ||
| 7500K | |||
| 9300K | |||
| User | |||
| Red Gain | (-/+, 0~199) | ||
| Green Gain | (-/+, 0~199) | ||
| Blue Gain | (-/+, 0~199) | ||
| Red Offset | (-/+, 0~199) | ||
| Green Offset | (-/+, 0~199) | ||
| Blue Offset | (-/+, 0~199) | ||
| Tint | (-/+, 0~100) | ||
| Saturation | (-/+, 0~100) | ||
| Sharpness | (-/+, 0~100) | ||
| Gamma | 1.8 | ||
| 2.0 | |||
| 2.2 | |||
| 2.35 | |||
| 2.5 | |||
| sRGB | |||
| Cubic | |||
| Reset Current Color Settings | Yes | ||
| Cancel | |||
| Sub-menu | Menu Option | |
|---|---|---|
| Aspect Ratio | Auto | |
| 4:3 | ||
| 16:9 | ||
| HDMI Setting | Range | Auto |
| Full | ||
| Limited | ||
| 3D Settings | 3D Sync | Auto |
| Off | ||
| Frame Sequential | ||
| Frame Packing | ||
| Top-Bottom | ||
| Side-by-Side | ||
| 3D Sync Invert | Disable | |
| Invert | ||
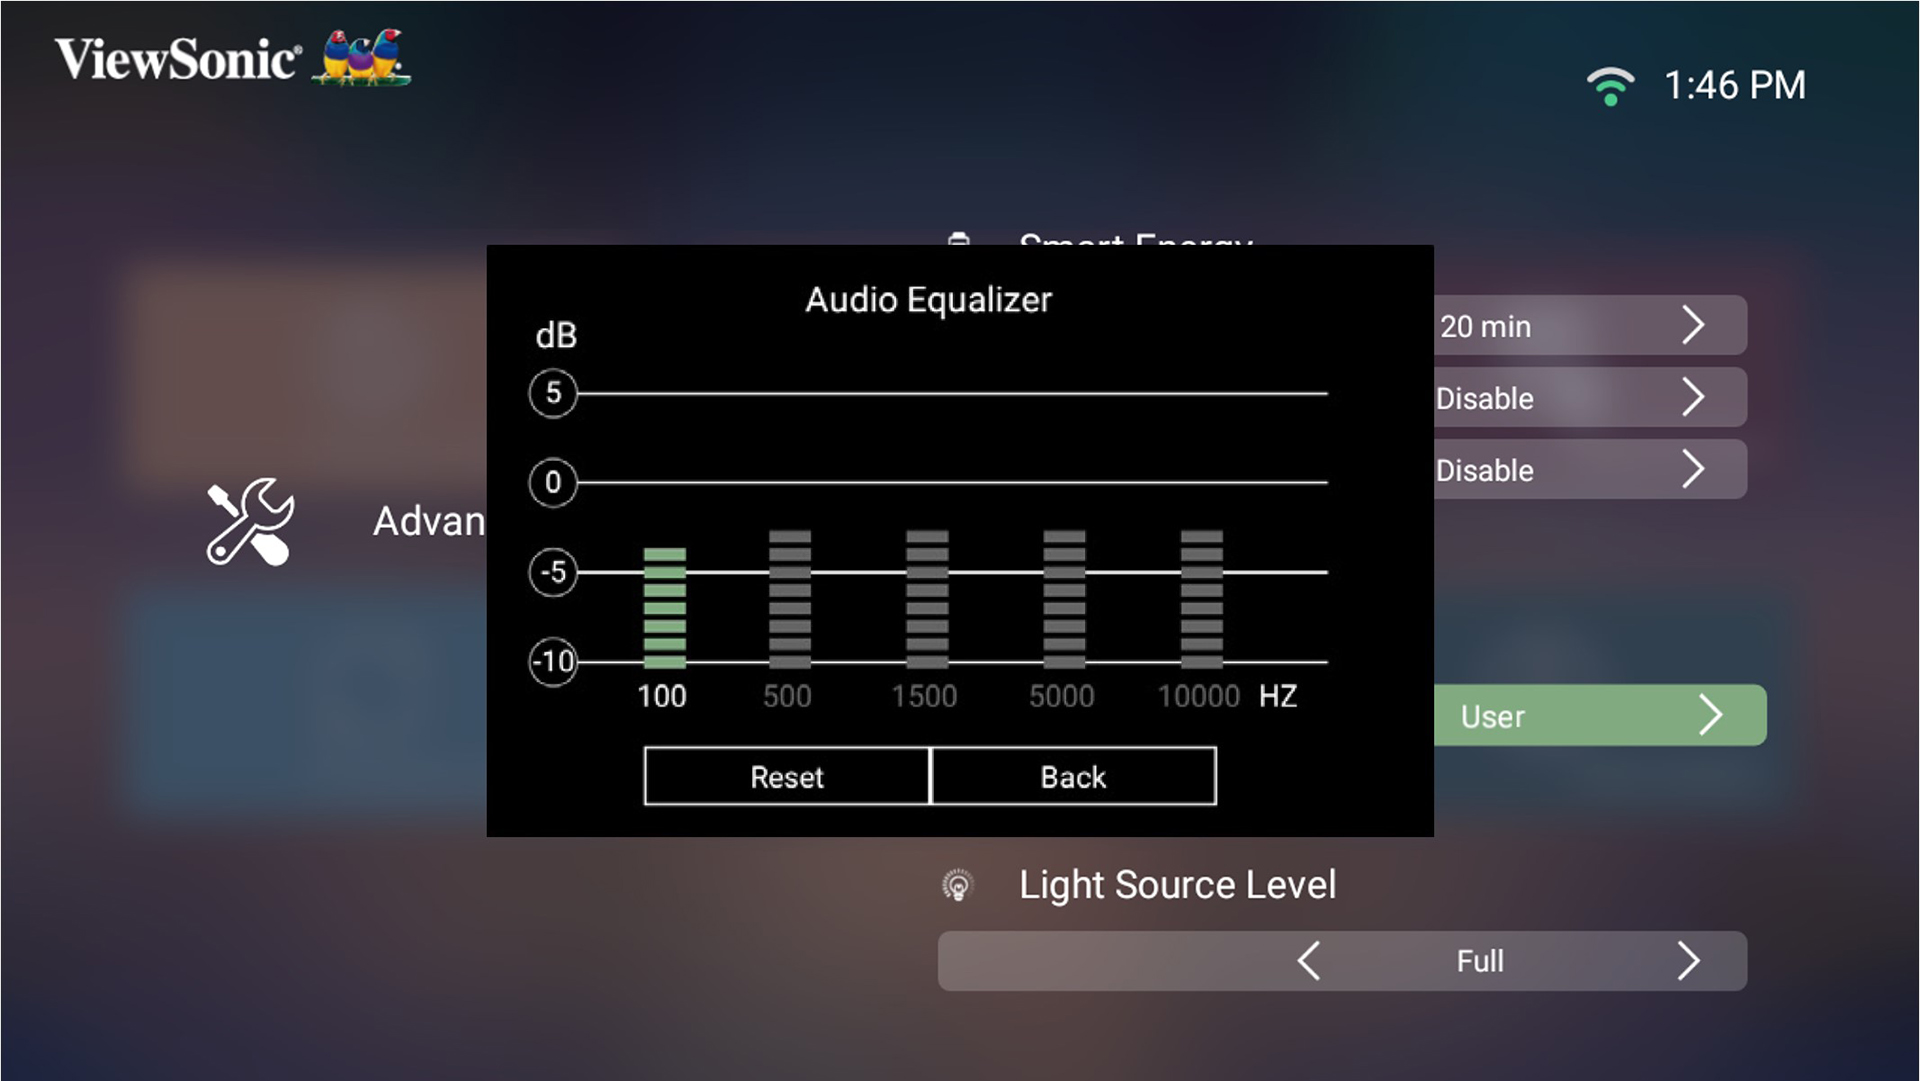
| harman/kardon | Audio Mode | Movie |
| Music | ||
| User | ||
| 100Hz | ||
| 500Hz | ||
| 1500Hz | ||
| 5000Hz | ||
| 10000Hz | ||
| Audio Volume | (-/+, 0~20) | |
| Mute | Off | |
| On | ||
| Sub-menu | Menu Option | ||
|---|---|---|---|
| Network Settings | Wi-Fi | Off | |
| On | SSID | ||
| Configure IP | |||
| IP Address | |||
| Subnet Mask | |||
| Default Gateway | |||
| DNS Server | |||
| Others | |||
| Basic Settings | Language | English | |
| French | |||
| German | |||
| Italian | |||
| Spanish | |||
| Russian | |||
| 繁體中文 | |||
| 簡體中文 | |||
| 日本語 | |||
| 韓語 | |||
| Swedish | |||
| Dutch | |||
| Turkish | |||
| Czech | |||
| Portuguese | |||
| Thai | |||
| Polish | |||
| Finnish | |||
| Arabic | |||
| Indonesian | |||
| Hindi | |||
| Vietnam | |||
| Greek | |||
| Projector Position | Front Table | ||
| Front Ceiling | |||
| Rear Table | |||
| Rear Ceiling | |||
| Keystone | Manual | (-/+, -40~40) | |
| Auto V Keystone | Disable | ||
| Enable | |||
| Date & Time | Automatic Date & Time | Off | |
| On | |||
| Date | |||
| Time | |||
| Time Zone | |||
| Time Format | 12 hours | ||
| 24 hours | |||
| Firmware Upgrade | Software Update Online | ||
| Software Update by USB | |||
| OTA Reminder | Enable | ||
| Diable | |||
| Software Version | |||
| Advanced Settings | Power On Source | Home | |
| HDMI | |||
| USB-C | |||
| Power On/Off Ring Tone | Off | ||
| On | |||
| Smart Energy | Auto Power Off | Disable | |
| 10 minutes | |||
| 20 minutes | |||
| 30 minutes | |||
| Sleep Timer | Disable | ||
| 30 minutes | |||
| 1 hour | |||
| 2 hours | |||
| 3 hours | |||
| 4 hours | |||
| 8 hours | |||
| 12 hours | |||
| Power Saving | Enable | ||
| Disable | |||
| harmon/kardon | Audio Mode | Movie | |
| Music | |||
| User | |||
| Audio Volume | (-/+, 0~20) | ||
| Mute | Off | ||
| On | |||
| Light Source Level | Full | ||
| Eco | |||
| Extended Eco | |||
| Battery Saving | |||
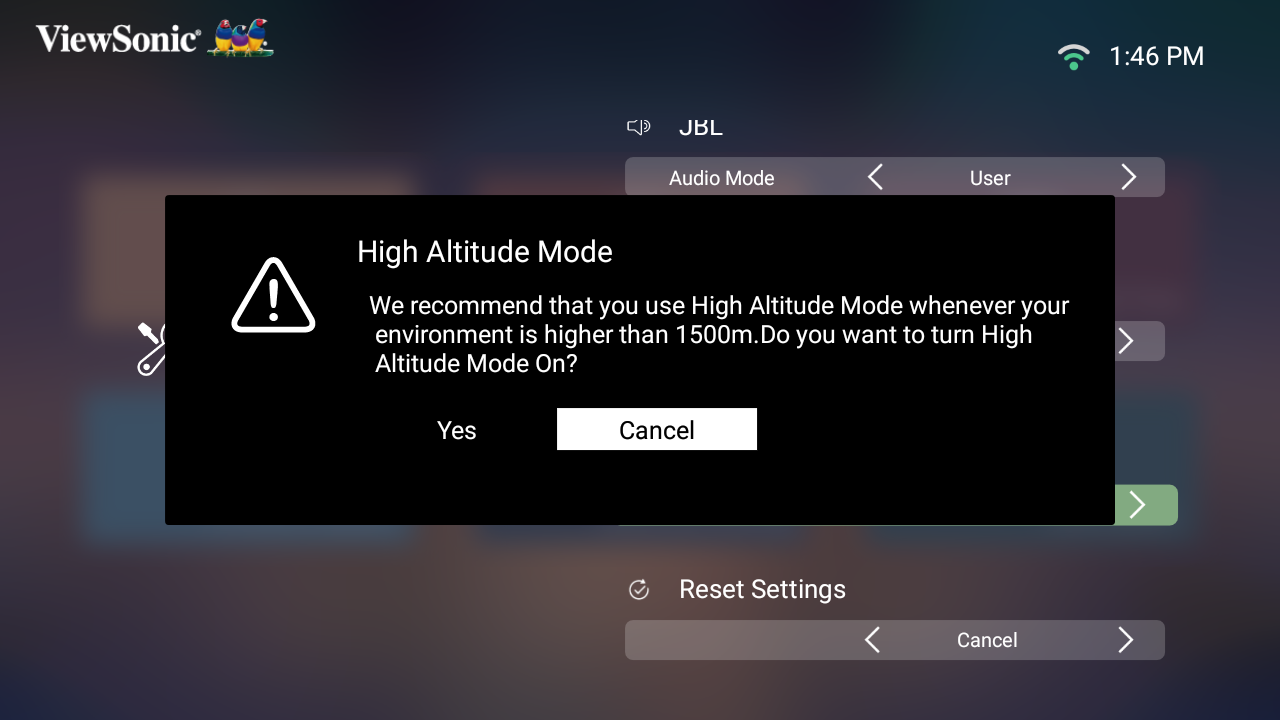
| High Altitude Mode | Off | ||
| On | |||
| Reset Settings | Yes | ||
| Cancel | |||
| Reset to Factory Default | Yes | ||
| Cancel | |||
| Information | Light Source Hours | ||
| System Version | |||
| Memory Information | XX GB of XX GB Used | ||
| Wi-Fi Mac Address | |||
| Serial Number | |||
| Menu Option | Description |
|---|---|
| Color Mode | The projector is preset with several predefined picture modes so that you can choose one to suit your operating environment and input signal. |
Brightest
Maximizes the brightness of the projected image. This mode is suitable for environments where extra-high brightness is required, i.e. well-lit rooms.
TV
Optimized for viewing sports in well-lit environments.
Movie
Appropriate for colorful movies, video clips from digital cameras, or DVs through the PC input. Best for low-light environments.
Gaming
Designed for playing video games.
User 1/User 2
Recalls the customized user settings.
| Menu Option | Description |
|---|---|
| Aspect Ratio | The Aspect Ratio is the ratio of the image width to the image height. With the advent of digital signal processing, digital display devices, like this projector, can dynamically stretch and scale the image output to a different aspect than that of the image input signal. NOTE: Only supports HDMI/USB-C signal input. |
Auto
Scales an image proportionally to fit the projector’s native resolution in its horizontal width. This is suitable for the incoming image which is neither 4:3 nor 16:9 and you want to make the most use of the screen without altering the image’s aspect ratio.
4:3
Scales an image so that it is displayed in the center of the screen with a 4:3 aspect ratio. This is most suitable for 4:3 images like computer monitors, standard definition TV, and 4:3 aspect DVD movies, as it displays them without aspect alteration.
16:9
Scales an image so that it is displayed in the center of the screen with a 16:9 aspect ratio. This is most suitable for images which are already in a 16:9 aspect, like high definition TV.
Select a suitable color range according to the color range setting of the connected output device.
3D Format
Adjust and choose from: Automatic, Off, Frame Sequential, Frame Packing, Top-Bottom, Side-by-Side.
3D Sync Invert
Allows for correction if the 3D image depth is inversed.
100% power consumption
Eco
70% power consumption
Extended Eco
55% power consumption
Battery Saving
30% power consumption
Provides a user interface to manage files and folders.
Access and view all the applications you have installed.
Select the appropriate Bluetooth mode.
Manage various categories such as: Network settings, Basic and Advanced settings, Date & Time, Firmware update, and system Information.
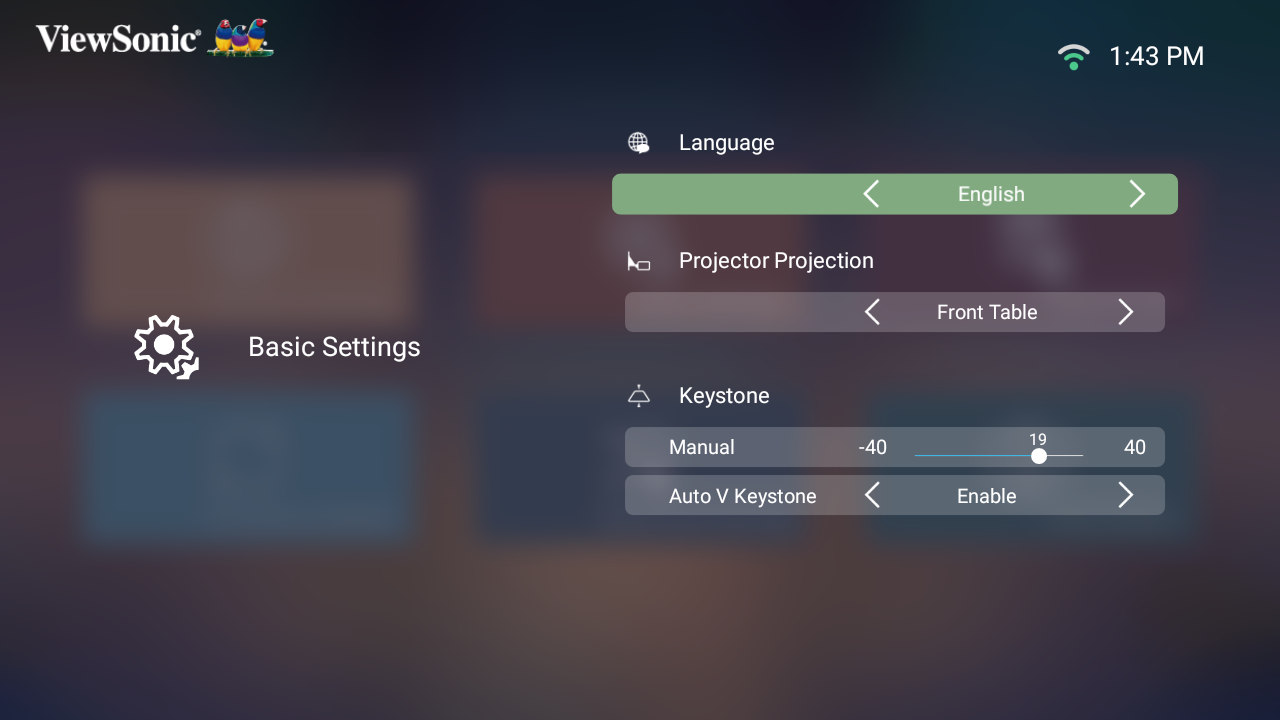
| Menu Option | Description |
|---|---|
| Language | Select your desired language. |
| Projector Position | Select the preferred projection position. |
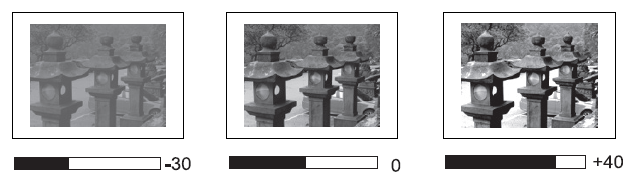
| Keystone | Adjust trapezoidal screen image distortion. |
Manual
Keystone can be adjusted manually from -40 to 40.
Auto V Keystone
Provides a rectangular screen image by automatically adjusting the keystone number when there is a trapezoidal screen image caused by the tilting of the projector.
| Menu Option | Description |
|---|---|
| Automatic Date & Time | Users can synchronize the date and time automatically after connecting to the Internet. |
On
Turn on synchronization.
Off
Turn off synchronization.
12 Hours
12-hour clock.
24 Hours
24-hour clock.
| Menu Option | Description |
|---|---|
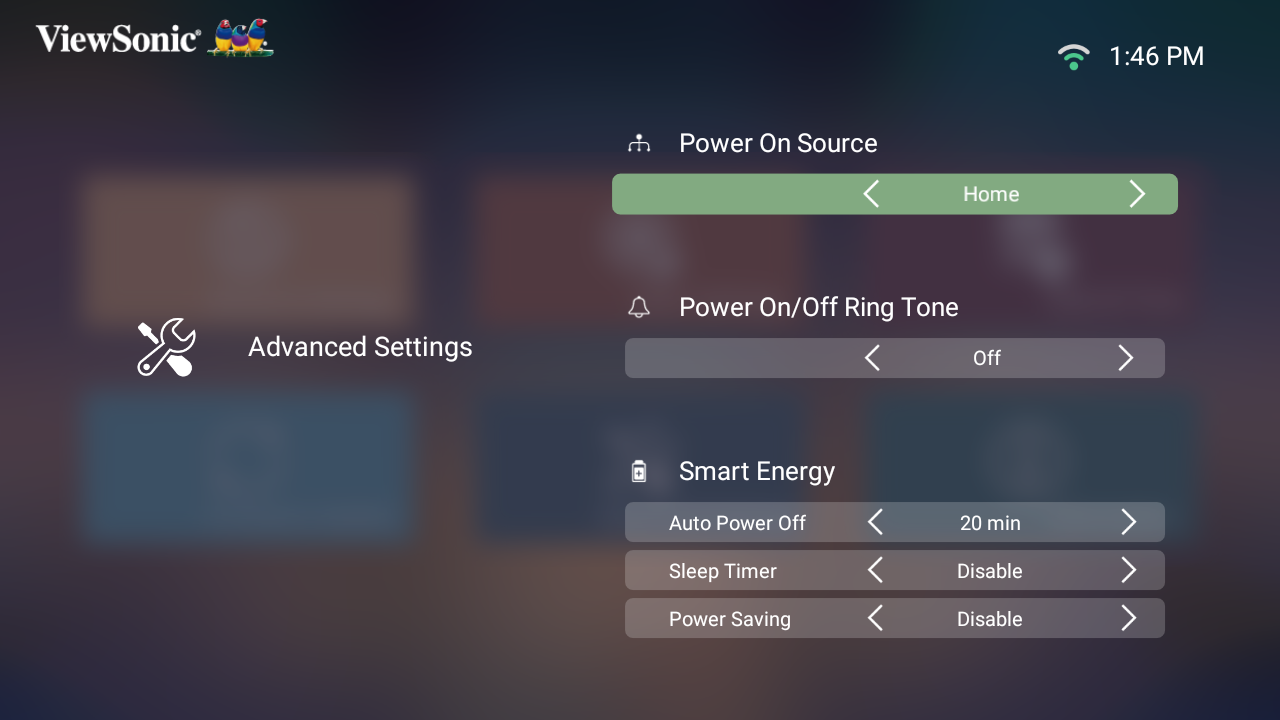
| Power On Source | Allows the user to enter the desired source directly after turning on the projector. |
| Power On/Off Ring Tone | Enable or disable the power on/off ring tone. |
| Auto Power On | Direct Power On |
Turn on the projector automatically once plugged into an outlet.
The projector can turn off automatically after a set period of time once no input source is detected.
Sleep Timer
Turn off automatically after a set period of time.
Power Saving
Lower power consumption if no input source is detected after five (5) minutes.
Audio Volume
Adjust the volume from 0 to 20.
Mute
Mute or unmute the volume.
Full
100% power consumption
Eco
70% power consumption
Extended Eco
55% power consumption
Battery Saving
30% power consumption
Mirror your personal device’s screen through the projector.
Select your favorite Apps and add them to the Home Screen.
| Model No. | P/N |
|---|---|
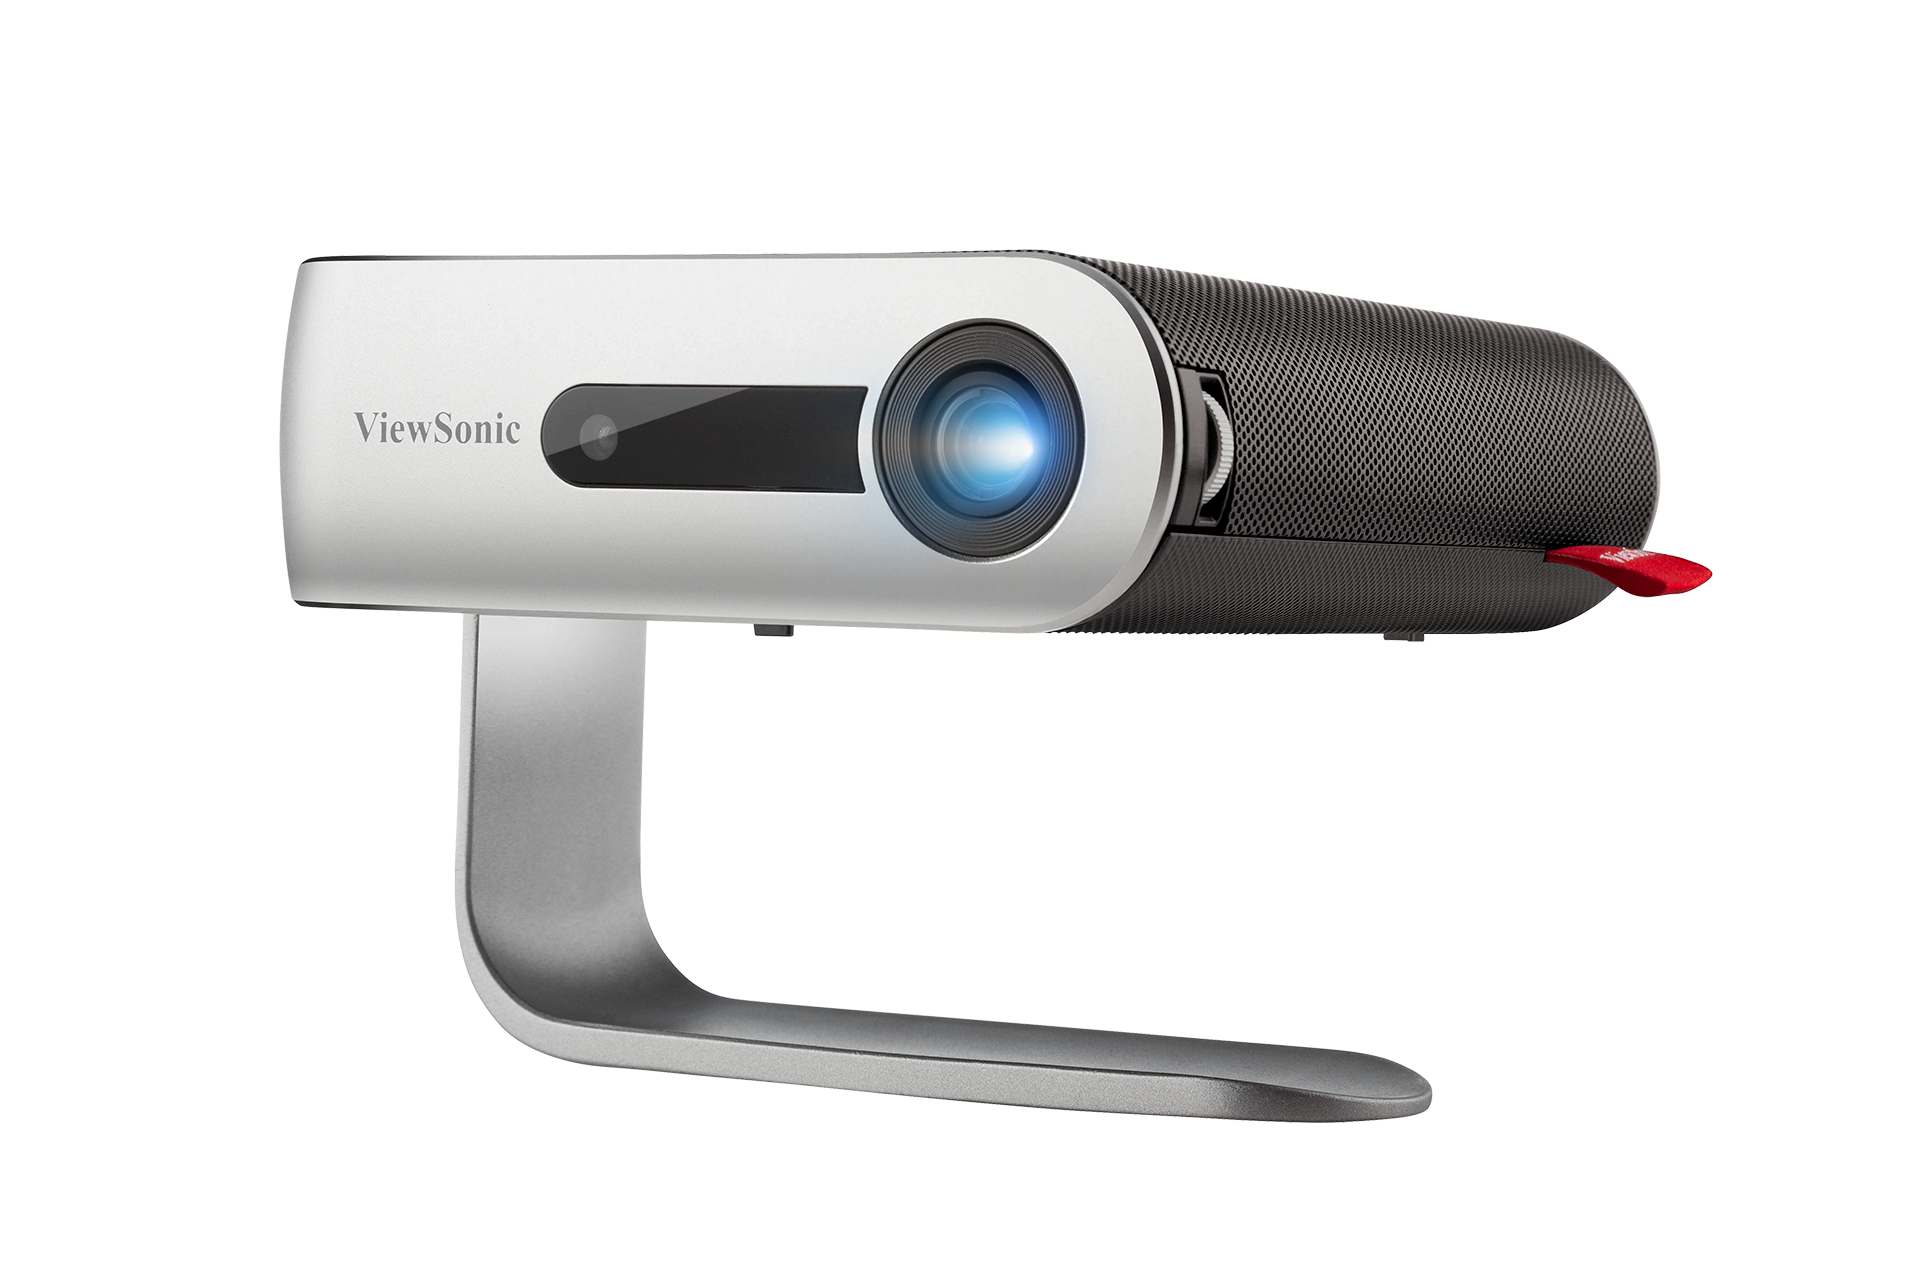
| VS18242 | M1+ |
| Item | Category | Specifications |
|---|---|---|
| Projector | Type | 0.2” WVGA, LED |
| Display Size | 24”~100” | |
| Throw Distance | 0.64-2.66 m (38” @ 1m) | |
| Lens | F=1.7, f=5.5 mm | |
| Optical Zoom | Fixed | |
| Lamp Type | RGB LED | |
| Light Source Life |
(5.94” x 4.96” x 1.57”)
| Timing | Resolution | Horizontal Frequency (KHz) | Vertical Frequency (Hz) | Dot Clock Frequency (MHz) |
|---|---|---|---|---|
| 480i | 720(1440) x 480 | 15.73 | 59.94 | 27 |
| 480p | 720 x 480 | 31.47 | 59.94 | 27 |
| 576i | 720(1440) x 576 | 15.63 | 50 | 27 |
| 576p | 720 x 576 | 31.25 | 50 | 27 |
| 720/50p | 1280 x 720 | 37.5 | 50 | 74.25 |
| 720/60p | 1280 x 720 | 45 | 60 | 74.25 |
| 1080/50i | 1920 x 1080 | 28.13 | 50 | 74.25 |
| 1080/60i | 1920 x 1080 | 33.75 | 60 | 74.25 |
| 1080/24p | 1920 x 1080 | 27 | 24 | 74.25 |
| 1080/25p | 1920 x 1080 | 28.13 | 25 | 74.25 |
| 1080/30p | 1920 x 1080 | 33.75 | 30 | 74.25 |
| 1080/50p | 1920 x 1080 | 56.25 | 50 | 148.5 |
| 1080/60p | 1920 x 1080 | 67.5 | 60 | 148.5 |
| Resolution | Refresh Rate (Hz) | Horizontal Frequency (kHz) | Dot Clock Frequency (MHz) |
|---|---|---|---|
| 640 x 480 | 59.94 | 31.469 | 25.175 |
| 72.809 | 37.861 | 31.5 | |
| 75 | 37.5 | 31.5 | |
| 720 x 400 | 70.087 | 31.469 | 28.3221 |
| 800 x 600 | 56.250 | 35.156 | 36 |
| 60.317 | 37.879 | 40 | |
| 72.188 | 48.077 | 50 | |
| 75 | 46.875 | 49.5 | |
| 1024 x 768 | 60.004 | 48.363 | 65 |
| 70.069 | 56.476 | 75 | |
| 75.029 | 60.023 | 78.75 | |
| 1152 x 864 | 75 | 67.5 | 108 |
| 1280 x 768 | 59.87 | 47.776 | 79.5 |
| 74.893 | 60.289 | 102.25 | |
| 1280 x 800 | 59.81 | 49.702 | 83.5 |
| 74.934 | 62.795 | 106.5 | |
| 1280 x 960 | 60 | 60 | 108 |
| 1280 x 1024 | 60.02 | 63.981 | 108 |
| 75.025 | 79.976 | 135 | |
| 1360 x 768 | 60.015 | 47.712 | 85.5 |
| 1400 x 1050 | 59.978 | 65.317 | 121.75 |
| 1440 x 900 | 59.887 | 55.935 | 106.5 |
| 60 | 55.469 | 88.75 | |
| 74.984 | 70.635 | 136.75 | |
| 1600 x 1200 | 60 | 75 | 162 |
| 1680 x 1050 | 59.883 | 64.674 | 119 |
| 59.954 | 65.29 | 146.25 |
| HDMI 3D (BlueRay 3D with info frame) | ||||
|---|---|---|---|---|
| Signal | Resolution (dots) | Aspect Ratio | Refresh Rate (Hz) | Support |
| Frame Packing | ||||
| 1080p | 1920 x 1080 | 16:9 | 23.98/24 | Yes |
| 720p | 1280 x 720 | 16:9 | 50/59.94/60 | Yes |
| Side by Side | ||||
| 1080i | 1920 x 1080 | 16:9 | 50/59.94/60 | Yes |
| Top and Bottom | ||||
| 1080p | 1920 x 1080 | 16:9 | 23.98/24 | Yes |
| 720p | 1280 x 720 | 16:9 | 50/59.94/60 | Yes |
| 3D (HDMI) Manual Setting | ||||
|---|---|---|---|---|
| Signal | Resolution (dots) | Aspect Ratio | Refresh Rate (Hz) | Support |
| SVGA | 800 x 600 | 4:3 | 60*/120** | Yes |
| XGA | 1024 x 768 | 4:3 | 60*/120** | Yes |
| HD | 1280 x 720 | 16:9 | 60*/120** | Yes |
| WXGA | 1280 x 800 | 16:9 | 60*/120** | Yes |
| HDTV(1080p) | 1920 x 1080 | 16:9 | 60 | Yes |
| Light | Description |
|---|---|
| Green | Power On |
| Red | Stand-by Mode |
| Flashing White | Projector Charging |
| Solid White | Battery is Fully Charged |
This section addresses all connected requirements and statements regarding regulations. Confirmed corresponding applications shall refer to nameplate labels and relevant markings on the unit.
This device complies with part 15 of FCC Rules. Operation is subject to the following two conditions: (1) this device may not cause harmful interference, and (2) this device must accept any interference received, including interference that may cause undesired operation. This equipment has been tested and found to comply with the limits for a Class B digital device, pursuant to part 15 of the FCC Rules.
These limits are designed to provide reasonable protection against harmful interference in a residential installation. This equipment generates, uses, and can radiate radio frequency energy, and if not installed and used in accordance with the instructions, may cause harmful interference to radio communications. However, there is no guarantee that interference will not occur in a particular installation. If this equipment does cause harmful interference to radio or television reception, which can be determined by turning the equipment off and on, the user is encouraged to try to correct the interference by one or more of the following measures:
The antenna(s) used for this transmitter must not be collocated or operating in conjunction with any other antenna or transmitter.
The device was tested and complies to measurement standards and procedures specified in FCC CFR Tile 47 Part 15 Subpart C.
Warning: You are cautioned that changes or modifications not expressly approved by the party responsible for compliance could void your authority to operate the equipment.
This equipment complies with FCC radiation exposure limits set forth for an uncontrolled environment. End users must follow the specific operating instructions for satisfying RF exposure compliance.
This transmitter must not be co-located or operating in conjunction with any other antenna or transmitter. This equipment should be installed and operated with a minimum distance of 20 centimeters between the radiator and your body.
The users manual or instruction manual for an intentional or unintentional radiator shall caution the user that changes or modifications not expressly approved by the party responsible for compliance could void the user’s authority to operate the equipment.
This device complies with Industry Canada license- exempt RSS standard(s). Operation is subject to the following two conditions: (1) this device may not cause interference, and (2) this device must accept any interference, including interference that may cause undesired operation of the device.
Le présent appareil est conforme aux CNR d’Industrie Canada applicables aux appareils radio exempts de licence. L’exploitation est autorisée aux deux conditions suivantes : ( 1 ) l’appareil ne doit pas produire de brouillage, et ( 2) l’utilisateur de l’appareil doit accepter tout brouillage radioélectrique subi, méme si le brouillage est susceptible d’en compromettre le fonctionnement.
For product available in the USA/Canada market, only channel 1~11 can be operated. Selection of other channels is not possible.
Pour les produits disponibles aux États-Unis/Canada du marché, seul le canal 1 à 11 peuvent être exploités. Sélection d’autres canaux n’est pas possible.
This equipment complied with IC RSS-102 radiation exposure limits set forth for an uncontrolled environment. This equipment should be installed and operated with minimum distance 20cm between the radiator & your body. The device for the band 5150-5825 MHz is only for indoor usage to reduce potential for harmful interference to co-channel mobile satellite systems.
Cet équipement est conforme aux limites d’exposition aux rayonnements IC établies pour un environnement non contrôlê. Cet équipement doit être installé et utilize avec un minimum de 20cm de distance entre la source de rayonnement et votre corps. les dispositifs fonctionnant dans la bande 5150-5825 MHz sont réservés uniquement pour une utilisation à l’intérieur afin de réduire les risques de brouillage préjudiciable aux systèmes de satellites mobiles utilisant les mêmes canaux.
The device complies with the EMC Directive 2014/30/EU and Low Voltage Directive 2014/35/EU.
The following information is only for EU-member states:
The mark shown to the right is in compliance with the Waste Electrical and Electronic Equipment Directive 2012/19/EU (WEEE). The mark indicates the requirement NOT to dispose of the equipment as unsorted municipal waste, but use the return and collection systems according to local law.
This product has been designed and manufactured in compliance with Directive 2011/65/EU of the European Parliament and the Council on restriction of the use of certain hazardous substances in electrical and electronic equipment (RoHS2 Directive) and is deemed to comply with the maximum concentration values issued by the European Technical Adaptation Committee (TAC) as shown below:
| Substance | Proposed Maximum Concentration | Actual Concentration |
|---|---|---|
| Lead (Pb) | 0.1% | < 0.1% |
| Mercury (Hg) | 0.1% | < 0.1% |
| Cadmium (Cd) | 0.01% | < 0.01% |
| Hexavalent Chromium (Cr6⁺) | 0.1% | < 0.1% |
| Polybrominated biphenyls (PBB) | 0.1% | < 0.1% |
| Polybrominated diphenyl ethers (PBDE) | 0.1% | < 0.1% |
| Bis (2-Ethylhexyl) phthalate (DEHP) | 0.1% | < 0.1% |
| Benzyl butyl phthalate (BBP) | 0.1% | < 0.1% |
| Dibutyl phthalate (DBP) | 0.1% | < 0.1% |
| Diisobutyl phthalate (DIBP) | 0.1% | < 0.1% |
Certain components of products as stated above are exempted under the Annex III of the RoHS2 Directives as noted below. Examples of exempted components are:
Restriction on Hazardous Substances statement (India). This product complies with the “India E-waste Rule 2011” and prohibits use of lead, mercury, hexavalent chromium, polybrominated biphenyls or polybrominated diphenyl ethers in concentrations exceeding 0.1 weight % and 0.01 weight % for cadmium, except for the exemptions set in Schedule 2 of the Rule.
ViewSonic® respects the environment and is committed to working and living green. Thank you for being part of Smarter, Greener Computing. Please visit the ViewSonic® website to learn more.
Copyright© ViewSonic® Corporation, 2020. All rights reserved.
Macintosh and Power Macintosh are registered trademarks of Apple Inc.
Microsoft, Windows, and the Windows logo are registered trademarks of Microsoft Corporation in the United States and other countries.
ViewSonic®, the three birds logo, OnView, ViewMatch, and ViewMeter are registered trademarks of ViewSonic® Corporation.
VESA is a registered trademark of the Video Electronics Standards Association. DPMS, DisplayPort, and DDC are trademarks of VESA.
ENERGY STAR® is a registered trademark of the U.S. Environmental Protection Agency (EPA).
As an ENERGY STAR® partner, ViewSonic® Corporation has determined that this product meets the ENERGY STAR® guidelines for energy efficiency.
Disclaimer: ViewSonic® Corporation shall not be liable for technical or editorial errors or omissions contained herein; nor for incidental or consequential damages resulting from furnishing this material, or the performance or use of this product.
In the interest of continuing product improvement, ViewSonic® Corporation reserves the right to change product specifications without notice. Information in this document may change without notice.
No part of this document may be copied, reproduced, or transmitted by any means, for any purpose without prior written permission from ViewSonic® Corporation.
M1+_UG_ENG Rev. 1A 2020-07-08
For technical support or product service, see the table below or contact your reseller.
You will need the product's serial number| Country / Region | Website |
|---|---|
| Australia | https://viewsonic.com/au/ |
| Bangladesh | https://www.viewsonic.com/bd/ |
| 中囯(China) | https://www.viewsonic.com.cn |
| 香港 (繁體中文) | https://www.viewsonic.com/hk/ |
| Hong Kong (English) | https://www.viewsonic.com/hk-en/ |
| India | https://www.viewsonic.com/in/ |
| Indonesia | https://www.viewsonic.com/id/ |
| Israel | https://www.viewsonic.com/il/ |
| 日本 (Japan) | https://www.viewsonic.com/jp/ |
| Korea | https://www.viewsonic.com/kr/ |
| Malaysia | https://www.viewsonic.com/my/ |
| Middle East | https://www.viewsonic.com/me/ |
| Myanmar | https://www.viewsonic.com/mm/ |
| Nepal | https://www.viewsonic.com/np/ |
| New Zealand | https://www.viewsonic.com/nz/ |
| Pakistan | https://www.viewsonic.com/pk/ |
| Philippines | https://www.viewsonic.com/ph/ |
| Singapore | https://www.viewsonic.com/sg/ |
| 臺灣 (Taiwan) | https://www.viewsonic.com/tw/ |
| ประเทศไทย (Thailand) | https://www.viewsonic.com/th/ |
| Việt Nam | https://www.viewsonic.com/vn/ |
| South Africa & Mauritius | https://www.viewsonic.com/za/ |
| Country / Region | Website |
|---|---|
| United States | https://www.viewsonic.com/us/ |
| Canada | https://www.viewsonic.com/us/ |
| Latin America | https://www.viewsonic.com/la/ |
| Country / Region | Website |
|---|---|
| Europe | https://www.viewsonic.com/eu/ |
| France | https://www.viewsonic.com/fr/ |
| Deutschland | https://www.viewsonic.com/de/ |
| Қазақстан | https://www.viewsonic.com/kz/ |
| Россия | https://www.viewsonic.com/ru/ |
| España | https://www.viewsonic.com/es/ |
| Türkiye | https://www.viewsonic.com/tr/ |
| Україна | https://www.viewsonic.com/ua/ |
| United Kingdom | https://www.viewsonic.com/uk/ |
ViewSonic® warrants its products to be free from defects in material and workmanship, under normal use, during the warranty period. If a product proves to be defective in material or workmanship during the warranty period, ViewSonic® will, at its sole option, repair or replace the product with a like product. Replacement product or parts may include remanufactured or refurbished parts or components.
Subject to the more limited one (1) year warranty set out below, North and South America: Three (3) years warranty for all parts excluding the lamp, three (3) years for labor, and one (1) year for the original lamp from the date of the first consumer purchase.
Other regions or countries: Please check with your local dealer or local ViewSonic® office for the warranty information.
Under heavy usage settings, where a projector’s use includes more than fourteen (14) hours average daily usage, North and South America: One (1) year warranty for all parts excluding the lamp, one (1) year for labor, and ninety (90) days for the original lamp from the date of the first consumer purchase; Europe: One (1) year warranty for all parts excluding the lamp, one (1) year for labor, and ninety (90) days for the original lamp from the date of the first consumer purchase. Other regions or countries: Please check with your local dealer or local ViewSonic® office for the warranty information. Lamp warranty subject to terms and conditions, verification and approval. Applies to manufacturer’s installed lamp only. All accessory lamps purchased separately are warranted for 90 days.
This warranty is valid only for the first consumer purchaser.
There are no warranties, express or implied, which extend beyond the description contained herein including the implied warranty of merchantability and fitness for a particular purpose.
ViewSonic’s liability is limited to the cost of repair or replacement of the product. ViewSonic® shall not be liable for:
This warranty gives you specific legal rights, and you may also have other rights which vary from local authority. Some local governments do not allow limitations on implied warranties and/or do not allow the exclusion of incidental or consequential damages, so the above limitations and exclusions may not apply to you.
For warranty information and service on ViewSonic® products sold outside of the U.S.A. and Canada, contact ViewSonic® or your local ViewSonic® dealer. The warranty period for this product in mainland China (Hong Kong, Macao, and Taiwan Excluded) is subject to the terms and conditions of the Maintenance Guarantee Card. For users in Europe and Russia, full details of warranty provided can be found at: ViewSonic EU under “Support/Warranty Information”.
ViewSonic® warrants its products to be free from defects in material and workmanship, under normal use, during the warranty period. If a product proves to be defective in material or workmanship during the warranty period, ViewSonic® will, at its sole option, repair or replace the product with a like product. Replacement product or parts may include remanufactured or refurbished parts or components & accessories.
3 years for all parts excluding the lamp, 3 years for labor, 1 year for the original lamp from the date of the first consumer purchase.
Lamp warranty subject to terms and conditions, verification and approval. Applies to manufacturer’s installed lamp only.
All accessory lamps purchased separately are warranted for 90 days.
This warranty is valid only for the first consumer purchaser.
For information about receiving service under warranty, contact ViewSonic® Customer Support (Please refer to the attached “Customer Service” page). You will need to provide your product’s serial number, so please record the product information in the space provided below on your purchase for your future use. Please retain your receipt of proof of purchase to support your warranty claim.
There are no warranties, express or implied, which extend beyond the description contained herein including the implied warranty of merchantability and fitness for a particular purpose.
ViewSonic®’s liability is limited to the cost of repair or replacement of the product. ViewSonic® shall not be liable for:
Name, address, of manufacturer and importers:
México, Av. de la Palma #8 Piso 2 Despacho 203, Corporativo Interpalmas,
Col. San Fernando Huixquilucan, Estado de México
Tel: (55) 3605-1099 http://www.viewsonic.com/la/soporte/index.htm
Hermosillo:
Distribuciones y Servicios Computacionales SA de CV.
Calle Juarez 284 local 2
Col. Bugambilias C.P: 83140
Tel: 01-66-22-14-9005
E-Mail: disc2@hmo.megared.net.mx
Villahermosa:
Compumantenimietnos Garantizados, S.A. de C.V.
AV. GREGORIO MENDEZ #1504
COL, FLORIDA C.P. 86040
Tel: 01 (993) 3 52 00 47 / 3522074 / 3 52 20 09
E-Mail: compumantenimientos@prodigy.net.mx
Puebla, Pue. (Matriz):
RENTA Y DATOS, S.A. DE C.V. Domicilio:
29 SUR 721 COL. LA PAZ
72160 PUEBLA, PUE.
Tel: 01(52).222.891.55.77 CON 10 LINEAS
E-Mail: datos@puebla.megared.net.mx
Veracruz, Ver.:
CONEXION Y DESARROLLO, S.A DE C.V. Av.
Americas # 419
ENTRE PINZÓN Y ALVARADO
Fracc. Reforma C.P. 91919
Tel: 01-22-91-00-31-67
E-Mail: gacosta@qplus.com.mx
Chihuahua:
Soluciones Globales en Computación
C. Magisterio # 3321 Col. Magisterial
Chihuahua, Chih.
Tel: 4136954
E-Mail: Cefeo@soluglobales.com
Cuernavaca:
Compusupport de Cuernavaca SA de CV
Francisco Leyva # 178 Col. Miguel Hidalgo
C.P. 62040, Cuernavaca Morelos
Tel: 01 777 3180579 / 01 777 3124014
E-Mail: aquevedo@compusupportcva.com
Distrito Federal:
QPLUS, S.A. de C.V.
Av. Coyoacán 931
Col. Del Valle 03100, México, D.F.
Tel: 01(52)55-50-00-27-35
E-Mail : gacosta@qplus.com.mx
Guadalajara, Jal.:
SERVICRECE, S.A. de C.V.
Av. Niños Héroes # 2281
Col. Arcos Sur, Sector Juárez
44170, Guadalajara, Jalisco
Tel: 01(52)33-36-15-15-43
E-Mail: mmiranda@servicrece.com
Guerrero Acapulco:
GS Computación (Grupo Sesicomp)
Progreso #6-A, Colo Centro
39300 Acapulco, Guerrero
Tel: 744-48-32627
Monterrey:
Global Product Services
Mar Caribe # 1987, Esquina con Golfo Pérsico
Fracc. Bernardo Reyes, CP 64280
Monterrey N.L. México
Tel: 8129-5103
E-Mail: aydeem@gps1.com.mx
MERIDA:
ELECTROSER
Av Reforma No. 403Gx39 y 41
Mérida, Yucatán, México CP97000
Tel: (52) 999-925-1916
E-Mail: rrrb@sureste.com
Oaxaca, Oax.:
CENTRO DE DISTRIBUCION Y
SERVICIO, S.A. de C.V.
Murguía # 708 P.A., Col. Centro, 68000, Oaxaca
Tel: 01(52)95-15-15-22-22
Fax: 01(52)95-15-13-67-00
E-Mail. gpotai2001@hotmail.com
Tijuana:
STD
Av Ferrocarril Sonora #3780 L-C
Col 20 de Noviembr
Tijuana, Mexico
FOR USA SUPPORT:
ViewSonic® Corporation
381 Brea Canyon Road, Walnut, CA. 91789 USA
Tel: 800-688-6688
http://www.viewsonic.com
Please read the following Safety Precautions before you start using the projector.

CAUTION: Possibly hazardous optical radiation is emitted from this product. As with any bright light source, do not stare into the beam, RG2 IEC 62471-5:2015
Aspect Ratio
Refers to the ratio of the image width to the image height.
Brightest Mode
Maximizes the brightness of the projected image. This mode is ideal for environments where extra-high brightness is required, such as using the projector in well lit rooms.
Adjusts background black levels of the screen image.
CEC (Consumer Electronics Control)
Synchronizes power on/off operation via HDMI connection. That is, if a device that also supports CEC function is connected to the HDMI input of the projector, when the projector’s power is turned off, the power of the connected device will also be turned off automatically. When the power of the connected device is turned on, the projector’s power will be turned on automatically.
Adjusts the color saturation.
Color Temperature
Allows users to select specific color temperature settings to further customize their viewing experience.
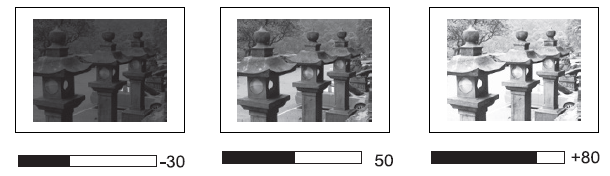
Adjusts the difference between the image background (black level) and the foreground (white level).
Manually improve the clarity of the projected image.
Allows the user to manually select the greyscale curve of the projector.
Audio/Video interface used to transmit video and audio via a single cable.
Allows the user to select HDMI greyscale range between 0~255 (full range) , 16~240 (limited range) or Auto by the signal type detected.
HDR (High-Dynamic Range)
Keeps the brightness level and enhances details on the dark level.
High Altitude Mode
Optional mode for users who live in an environment between 1,500 m and 3,000 m above sea level, and the temperature is between 5° C and 25° C. Activating it will improve projector cooling and performance.
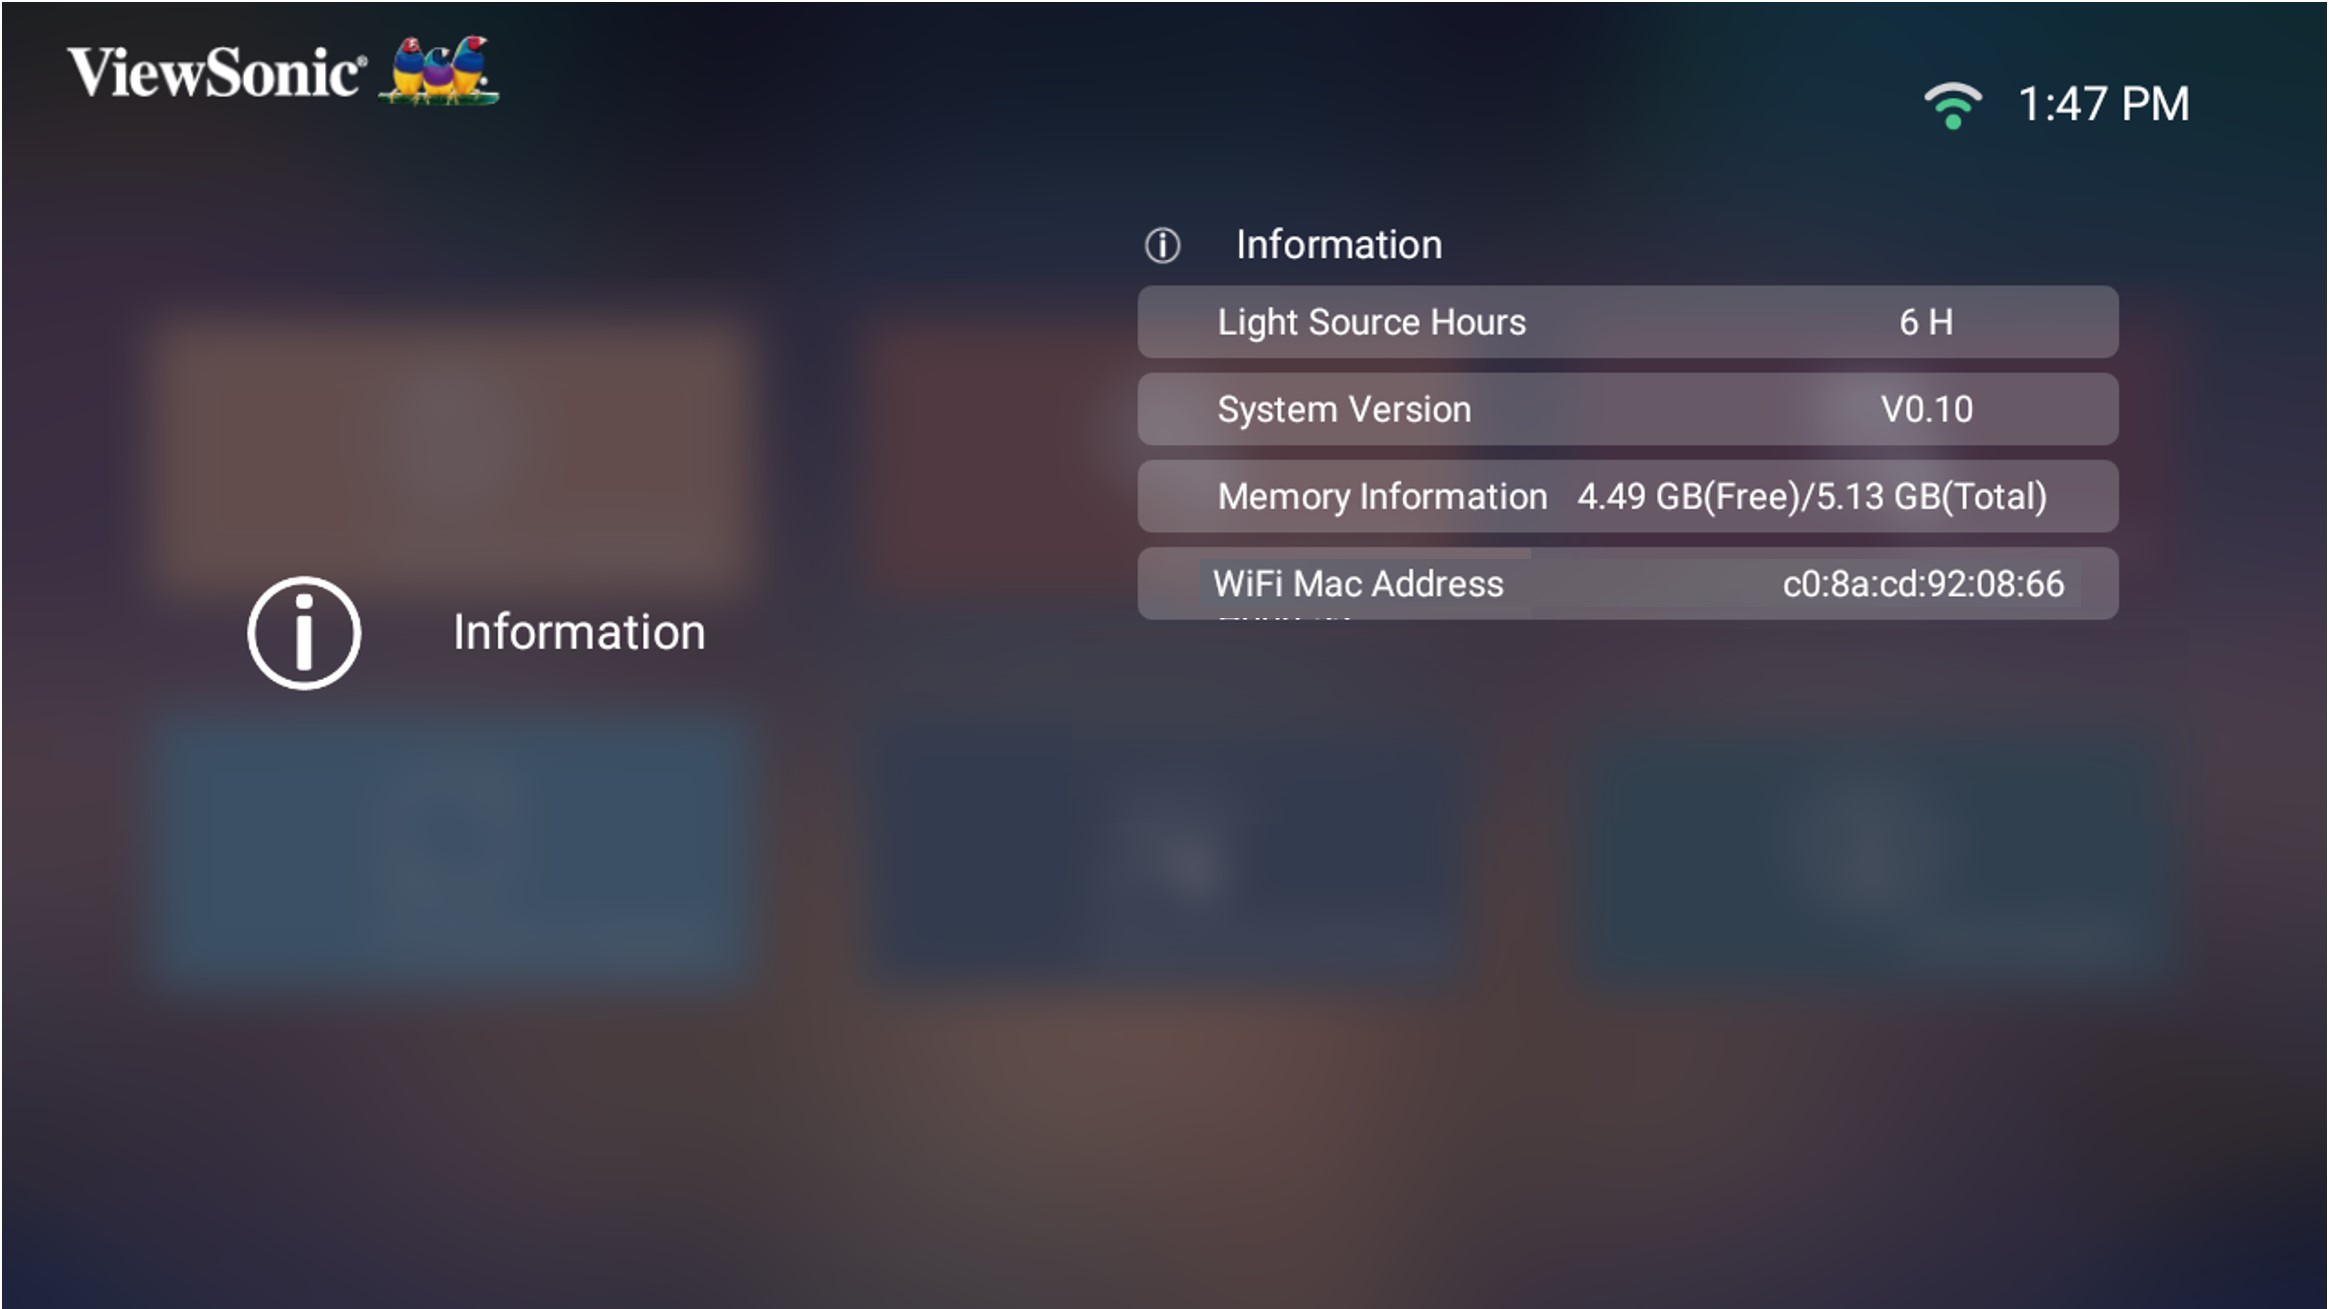
Information
Displays the timing mode (video signal input), the projector model number, the serial number, and the ViewSonic® website URL.
Input Select
Toggles between the various input options that are available for the projector.
The distortion of an image caused by projecting it onto an angled surface.
Light Source Level
Use Normal or Eco mode to adjust the brightness level and power consumption.
A Picture Mode appropriate for playing colorful movies, video clips from digital cameras, or DVs through the PC input. Best for a low light environment.
Adjusts the picture quality of the monitor.
Solution 1 ► Ensure the power cord is properly attached to the projector and to the power outlet.
Solution 2 ► If the cooling process has not completed, please wait until it has finished then try to turn on the projector again.
Solution 3 ► If the above does not work, try another power outlet or another electrical device with the same power outlet.
Solution 4 ► Check that the battery has remaining power, or needs external power.
Solution 1 ► Ensure the video source cable is connected properly, and that the video source is turned on.
Solution 2 ► If the input source is not selected automatically, select the correct source with the Source key on either the projector or the remote control.
Solution 1 ► Adjusting the Focus Ring will help correctly focus the projection lens.
Solution 2 ► Ensure the projector and screen are aligned properly. If necessary, adjust the height of the projector as well as the projection angle and direction.
Solution 1 ► Ensure there are no obstacles between the remote control and projector; and that they are within 8 m (26 ft) of each other.
Solution 2 ► The batteries may be out of power, please check and replace if necessary.
Solution ► Using a paper clip, carefully insert it into the Reset button at the rear of the projector to reset the device.
If you intend to store the projector for an extended period of time: